On A Rail

| |
| On A Rail | |
|---|---|
| Game information | |
| Designer(s) | |
| Map(s) |
|
| Previous chapter | |
| Next chapter | |
On A Rail is the eighth chapter of Half-Life.
Contents
Overview[edit]
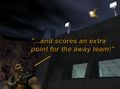
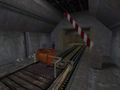
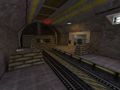
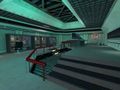
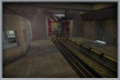
The chapter takes place in a large underground transit system in Sector E. At the beginning of the chapter, a waiting security guard delivers a message to the player from the science team at the Lambda Complex. The player is informed that he needs to travel through the rail system to reach a satellite delivery rocket. The science team needs this satellite in orbit to stop the alien invasion, but as the military has aborted the launch, the player must find the High Altitude Launch Center and launch it from the control room himself. The purpose of the rocket was later elaborated upon in the expansion, Decay.
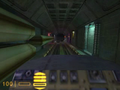
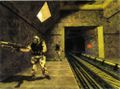
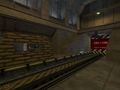
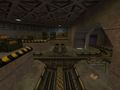
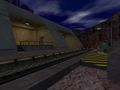
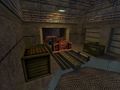
Trekking through the underground system of tunnels on foot is typically undesirable as the electrified rail is often the only means of transport over environmental obstacles such as flooded canals. Instead, travel is primarily accomplished with rail carts set on different tracks. The path of the rail carts can be switched at certain junctions, offering a somewhat non-linear gameplay experience. The tunnels themselves are laid out with several dead ends and looping tracks. Along the rails are a number of side areas that the player can stop his cart at and explore, sometimes a necessity in order to reach track controls that remove barriers. The path to the rocket is marked by numerous military outposts, fortifications, and gun emplacements waiting in ambush.
Development[edit]
Pre-release[edit]
Not much known about the early versions of the chapter. At least one Human Sergeant was to appear in the map c2a2e, in the area with the Vortigaunts. The area where the Sergeant is seen is called HWG in the source file of the map, which may stand for "Heavy Weapons Guy". Stukabats were to appear near the sparking electrical wires in the map c2a2f. They can be seen in "train.mpg", a trailer for the game.
Other versions[edit]
The console ports feature some minor changes. There is a door that can not be opened at the end of the map c2a2c. The player has to leave the rail cart behind, and go through an air duct in a nearby storage room to reach the next level. The player can't go back to the map c2a2f, because the ladder gets damaged when the player is climbing down. The level code for the chapter in the Dreamcast version is "Trains and Rockets". Half-Life: Source contains a couple of test maps that include portions of the chapter.[1]
Behind the scenes[edit]
Originally, the rail track at the end of the map c2a2f wasn't destroyed. The player could drive the train all the way (through the map c2a2g) to the next chapter, with no obstacles on the tracks. Unused Black Mesa Announcement System lines for the chapter can be found in the sentences file used for the speech system. The name of the chapter is Launch Control, Silo E in the document.
The source files of the maps from the leaked map pack feature many unused early set pieces. There is a set called c2a2c track with an Automatic Turret on the ceiling, hidden inside the map c2a2b1. This area appears as the transition area between the maps c2a2c and c2a3d in the final game with no turret.
Flocking Floaters were to appear and fight the Marines in the maps c2a2b1 and c2a2c. They were replaced with Vortigaunts in the final game. The ending area from the map c2a2e appears as a set piece in two levels. First in a set called floater lift in the map c2a2c where four Floaters are placed as "cyclers" (a generic entity type with no artificial intelligence). It is connected to a tunnel that leads to the map c2a2i which does not exist in the game. Second as an alternate ending for the map c2a2c hidden inside a set called c2a2h in the map c2a2b1.
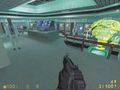
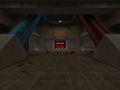
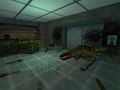
Launch center[edit]
There are some cut elements that suggest that there were requirements to launch the rocket. The launch center had two elevators in a back room, with their destination maps as c2a2c and c2a2a.[2] There are no elevators in both maps in the final version. The map c2a2b2, an optional area, however, has a non-functional elevator. In this map, there are two large pipes, colored blue and red, and using the same pipe textures from the chapter Blast Pit. They're connected to the silo where the rocket is. It should be noted that the same pipes also appear in the map c2a2a. They appear to be copied over from the map c2a2b2, and not related.
There are two interactive screens named "bay1screen" and "bay2screen" with empty target fields (used for triggering something when they're used) in the control room. These screens show the entrances to the silo from the map c2a2d. They were to be triggered by two trigger_auto entities with global variables (for storing information across level transitions), c2a2bay1screen and c2a2bay2screen, on the map start. There are no entities with these names anywhere in the chapter. It is possible that the player was to close the blast doors shown on the screens in order to launch the rocket, and the screens were placed there to check their status.

The back room with the elevators was later replaced with the control room from the cut chapter Communications Center. In one of the incarnations of the center, there were three scientists hiding from the Marines in the locked globe room. The scientist near the doors was to let the player inside when the player killed the Marines in the center. The player was to lead one of the scientists to the retinal scanner, and have them open the door to the control room.[a] The first scientist was to kneel down and observe his dead co-worker nearby after the scan. The scene is mentioned in the Fast Track version of the Prima Guide, so it is possible that it was cut from the game late in the development.[3] It can be also seen in some of the reviews of the game. The entities for the scene appears to be copied from the map c2a4e.
Easter eggs[edit]
The name "Riller" (made out of brushes) can be found on a wall hidden under the stairs in the map c2a2c. It is a reference to Dave Riller, Valve employee, and most likely the creator of the map. This Easter egg does not appear in the console ports of the game.
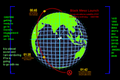
The holographic globe in the Launch Center shows a cross at approximately 110°W 40°N, in eastern Utah.
Gallery[edit]
Pre-release[edit]
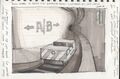
Concept art.
Human Sergeant in
c2a2e.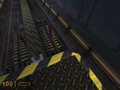
c2a2f.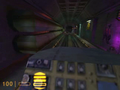
Ditto.
Ditto.

Ditto.
c2a2g.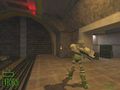
Ditto.
Ditto.
Ditto.
Ditto.
Ditto.
Ditto.

The launch center.
Ditto.
Ditto.
Ditto.

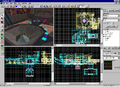
Early screenshot from Worldcraft.
Early Marines on the tracks.


Retail[edit]
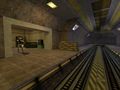
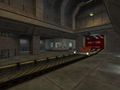
The entrance.
Dead HECU Marines in front of a blast door.

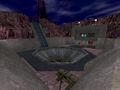
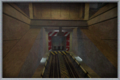
The satellite delivery rocket.
Non-functional elevator.
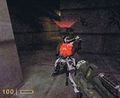
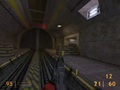
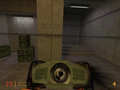
Gun emplacement.
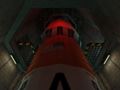
The satellite delivery rocket.
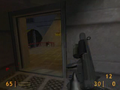
A security checkpoint near a blast door.
HECU Marine on a rail cart.
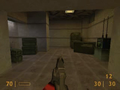
A gun emplacement.
Ditto, another place.
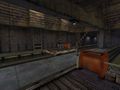
Outside of the Materials Transport.
The launch center.
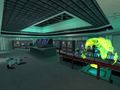
Inside.
Ditto.

The satellite delivery rocket.
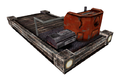
Apprehension version of a rail cart.


Other[edit]

The holographic globe.

Dreamcast version.[i]

PlayStation 2 version.
The satellite schematics.
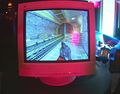
The launch center camera.
Ditto.

Riller Easter egg.
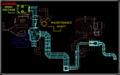
The transit system map depicting the early version of On A Rail.

The satellite delivery rocket.
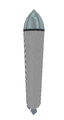
Early version.
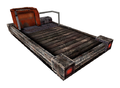
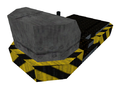
Rail cart.
From front.

Early version.
From front.
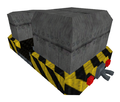
Another version.
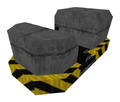
From front.


Associated media[edit]
 Additional images related to On A Rail
- Half-Life soundtrack
- Sirens in the Distance
- Drums and Riffs
 train.mpg on YouTube
Notes[edit]
References[edit]
- ↑ Half-Life: Source (
maps/hl1devtestc) - ↑
hl1-wc-maps(c2a2h) - ↑ Half-Life Prima Fast Track Guide on Prima Games (archived)