Difference between revisions of "Insecurity"
m (→Pre-release) |
m (→Trivia) |
||
| (18 intermediate revisions by 4 users not shown) | |||
| Line 1: | Line 1: | ||
| − | {{DISPLAYTITLE:'' | + | {{DISPLAYTITLE:''Insecurity''}} |
| − | {{Article|hl1}} | + | {{Article|hl1|safe}} |
| − | |||
| − | |||
{{Chapter Infobox | {{Chapter Infobox | ||
|image=[[File:Security2 lobby.jpg|250px]] | |image=[[File:Security2 lobby.jpg|250px]] | ||
| − | |name='' | + | |name=''Insecurity'' |
| − | |hidei= | + | |hidei=yes |
| − | |location= | + | |location= |
|hidep= | |hidep= | ||
| − | |era= | + | |era= |
| − | |maps= | + | |maps={{CollapsedMapInfobox| |
| − | |designer=[[David Mertz]]<ref name="resume">[http://davidmmertz.wordpress.com David Mertz's personal website]</ref> | + | *<code>ba_security1</code> |
| + | *<code>ba_security2</code> | ||
| + | *<code>ba_maint</code> | ||
| + | *<code>ba_elevator</code> | ||
| + | }} | ||
| + | |designer=[[Rob Heironimus]]<ref name="documentary">{{YouTubeTime|BQLEW1c-69c|1527|Unforeseen Consequences: A ''Half-Life'' Documentary}}</ref><br> | ||
| + | [[David Mertz]]<ref name="resume">[http://davidmmertz.wordpress.com David Mertz's personal website]</ref> | ||
|previous=''[[Living Quarters Outbound]]'' | |previous=''[[Living Quarters Outbound]]'' | ||
|next=''[[Duty Calls]]'' | |next=''[[Duty Calls]]'' | ||
}} | }} | ||
| − | ''''' | + | '''''Insecurity''''' is the second chapter of ''[[Half-Life: Blue Shift]]''. |
==Overview== | ==Overview== | ||
| − | {{See2|story | + | {{See2|the game's full story|the [[Half-Life: Blue Shift storyline]] article}} |
As the chapter begins, [[Barney Calhoun]] leaves the [[Black Mesa Transit System|tram]] and tries to enter his [[Area 3 Security Facilities|workplace]], but the entrance door fails to open. The [[Black Mesa Security Force|security guard]] on the other side informs him that the door is not responding to Barney's pass ID, so he has to wait for the guard to get it open. While he is waiting, [[Gordon Freeman]] passes by in another tram. | As the chapter begins, [[Barney Calhoun]] leaves the [[Black Mesa Transit System|tram]] and tries to enter his [[Area 3 Security Facilities|workplace]], but the entrance door fails to open. The [[Black Mesa Security Force|security guard]] on the other side informs him that the door is not responding to Barney's pass ID, so he has to wait for the guard to get it open. While he is waiting, [[Gordon Freeman]] passes by in another tram. | ||
| Line 28: | Line 32: | ||
==Behind the scenes== | ==Behind the scenes== | ||
| − | [[David Mertz]] was responsible for additional level design work on the chapter.<ref name="resume"/> The other contributors are unknown. It is possible that [[Rob Heironimus]] was one of them. His photo and a reference to him can be found in the map | + | [[David Mertz]] was responsible for additional level design work on the chapter.<ref name="resume"/> The other contributors are unknown. It is possible that [[Rob Heironimus]] was one of them. His photo and a reference to him can be found in the map <code>ba_security2</code> as Easter eggs. In ''[[Half-Life: Opposing Force|Opposing Force]]'', the same photo can be found in a level that he worked on. It was most likely placed there by himself. |
| − | There were [[Automatic Turret]]s placed in various areas of the Area 3 Security Facilities, including the entrance and the locker room. Although cut, the one in the entrance can be found in the tram ride version of the level, | + | There were [[Automatic Turret]]s placed in various areas of the Area 3 Security Facilities, including the [[:File:Insecurity early24.jpg|entrance]] and the [[:File:Insecurity early27.jpg|locker room]]. Although cut, the one in the entrance can be found in the tram ride version of the level, <code>ba_tram3</code>. When the player harmed any of the characters in these areas, they would turn on and attack the player, right before the game over message. |
===Easter eggs=== | ===Easter eggs=== | ||
| Line 41: | Line 45: | ||
===The bridge=== | ===The bridge=== | ||
In the cut ''Decay'' mission, [[Central Transit Hub]], the players would use a bridge to crush a [[Gargantua]] to destroy it. The [[:File:Other5 cut.jpg|design for this bridge]] appears to be similar to the [[:File:Maint bridge01.jpg|one found in the maintenance area]] of the chapter. It is unknown if they recycled the same brushwork. | In the cut ''Decay'' mission, [[Central Transit Hub]], the players would use a bridge to crush a [[Gargantua]] to destroy it. The [[:File:Other5 cut.jpg|design for this bridge]] appears to be similar to the [[:File:Maint bridge01.jpg|one found in the maintenance area]] of the chapter. It is unknown if they recycled the same brushwork. | ||
| + | |||
| + | ==Behind the scenes== | ||
| + | According to [[Randy Pitchford]], the elevator ride sequence was created by [[Rob Heironimus]], who spent his time during ''Blue Shift''{{'}}s development solely on perfecting it.<ref name="documentary" /> | ||
==Trivia== | ==Trivia== | ||
The player can monitor several interesting key areas from the video surveillance room. These show Gordon Freeman when he is heading to the locker room to get his [[Hazardous Environment Suit|protective suit]], [[Gina Cross]] when she is delivering the [[Materials Handler|crystal sample]] to the test chamber, and the armory nearby. | The player can monitor several interesting key areas from the video surveillance room. These show Gordon Freeman when he is heading to the locker room to get his [[Hazardous Environment Suit|protective suit]], [[Gina Cross]] when she is delivering the [[Materials Handler|crystal sample]] to the test chamber, and the armory nearby. | ||
| − | The [[:File:Otis donut.jpg|overweight security guard]] variant from ''Opposing Force'' appears in the shooting range. The [[The G-Man|G-Man]] is seen in a tram passing by when Barney is going through a maintenance area. This is his only appearance in the game. The level code for the chapter is | + | The [[:File:Otis donut.jpg|overweight security guard]] variant from ''Opposing Force'' appears in the shooting range. The [[The G-Man|G-Man]] is seen in a tram passing by when Barney is going through a maintenance area. This is his only appearance in the game. The level code for the chapter is ''Barney Goes to Work'' in the [[Half-Life (Dreamcast port)|Dreamcast version]]. |
==Gallery== | ==Gallery== | ||
| + | {{NoCaptions}} | ||
===Pre-release=== | ===Pre-release=== | ||
<gallery> | <gallery> | ||
| Line 86: | Line 94: | ||
File:Insecurity early42.jpg|Ditto. | File:Insecurity early42.jpg|Ditto. | ||
File:Insecurity early10.jpg|Ditto. | File:Insecurity early10.jpg|Ditto. | ||
| + | File:Insecurity early45.jpg|Ditto. | ||
File:Insecurity early18.jpg|Ditto. | File:Insecurity early18.jpg|Ditto. | ||
File:Insecurity early37.jpg | File:Insecurity early37.jpg | ||
| Line 113: | Line 122: | ||
File:Shooting range gun.jpg|Ditto. | File:Shooting range gun.jpg|Ditto. | ||
File:Are you crazy.jpg|The shooting range. | File:Are you crazy.jpg|The shooting range. | ||
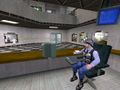
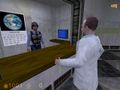
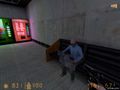
| − | File:Maint computer.jpg | + | File:Maint computer.jpg|Scientist working on a malfunctioning computer. |
File:Maint station.jpg|Sector C tram station. | File:Maint station.jpg|Sector C tram station. | ||
<!--File:Mesa times scientist.jpg--> | <!--File:Mesa times scientist.jpg--> | ||
| Line 119: | Line 128: | ||
File:Main Access Lift from BMTS.jpg|Sector G tram station. | File:Main Access Lift from BMTS.jpg|Sector G tram station. | ||
File:Elevator ride01.jpg|Sector G Main Access Lift. | File:Elevator ride01.jpg|Sector G Main Access Lift. | ||
| − | File: | + | File:Elevator ride02.jpg |
File:Ba cart.jpg | File:Ba cart.jpg | ||
<!--File:Ba maint02.jpg--> | <!--File:Ba maint02.jpg--> | ||
| Line 137: | Line 146: | ||
<!--File:Dancing scientist2.jpg|Ditto.--> | <!--File:Dancing scientist2.jpg|Ditto.--> | ||
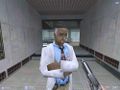
File:Otis donut.jpg|The overweight guard. | File:Otis donut.jpg|The overweight guard. | ||
| − | File:C0a0 barney.jpg | + | <!--File:C0a0 barney.jpg|Crossover.--> |
| − | File:Ht01 cart02.jpg | + | <!--File:Ht01 cart02.jpg|Crossover.--> |
<!--File:Maint bridge01.jpg|The bridge.--> | <!--File:Maint bridge01.jpg|The bridge.--> | ||
<!--File:Maint bridge02.jpg|Ditto.--> | <!--File:Maint bridge02.jpg|Ditto.--> | ||
| Line 147: | Line 156: | ||
*{{ImagecatInline|Insecurity images}} | *{{ImagecatInline|Insecurity images}} | ||
<!--*{{ScenesInline}}--> | <!--*{{ScenesInline}}--> | ||
| − | + | *''Half-Life: Blue Shift'' (Dreamcast port) soundtrack, ''[[Half-Life: Blue Shift soundtrack|Steam in the Pipes]]'' | |
| − | |||
==References== | ==References== | ||
| Line 155: | Line 163: | ||
{{Chapters}} | {{Chapters}} | ||
[[Category:Half-Life: Blue Shift chapters]] | [[Category:Half-Life: Blue Shift chapters]] | ||
| − | |||
Revision as of 00:39, 18 December 2018

| |
| Insecurity | |
|---|---|
| Game information | |
| Designer(s) | |
| Map(s) |
|
| Previous chapter | |
| Next chapter | |
Insecurity is the second chapter of Half-Life: Blue Shift.
Contents
Overview
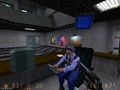
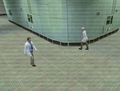
As the chapter begins, Barney Calhoun leaves the tram and tries to enter his workplace, but the entrance door fails to open. The security guard on the other side informs him that the door is not responding to Barney's pass ID, so he has to wait for the guard to get it open. While he is waiting, Gordon Freeman passes by in another tram.
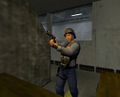
When the door is open, the guard explains that they've been having problems all over the facility this morning, including system crashes and security malfunctions. After Barney acquires his uniform and sidearm, he is sent to help some scientists who are having problems with the main access lift in Sector G.
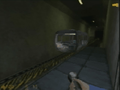
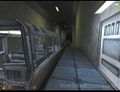
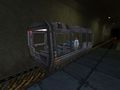
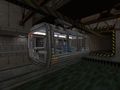
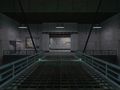
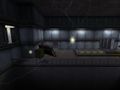
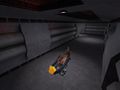
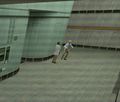
Since the trams are also having problems, Barney walks through maintenance areas to reach his destination. He arrives and activates the elevator. The Black Mesa incident occurs during this ride. Eventually the elevator stops and crashes down to the ground floor.
Behind the scenes
David Mertz was responsible for additional level design work on the chapter.[2] The other contributors are unknown. It is possible that Rob Heironimus was one of them. His photo and a reference to him can be found in the map ba_security2 as Easter eggs. In Opposing Force, the same photo can be found in a level that he worked on. It was most likely placed there by himself.
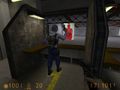
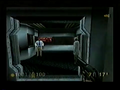
There were Automatic Turrets placed in various areas of the Area 3 Security Facilities, including the entrance and the locker room. Although cut, the one in the entrance can be found in the tram ride version of the level, ba_tram3. When the player harmed any of the characters in these areas, they would turn on and attack the player, right before the game over message.
Easter eggs
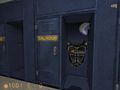
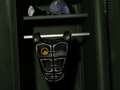
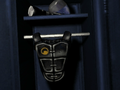
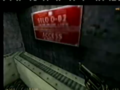
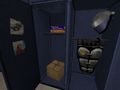
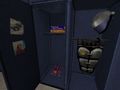
The locker room contains a couple of Easter eggs. The names of the developers can be found on the lockers. This has been a tradition in the series since the original game. A photo of Rob Heironimus with plastic Easter eggs in his eye sockets can be found in a broken stall. The photo was taken by his co-worker John Faulkenbury in Easter 1998 (see the Easter eggs page for other appearances of the photo).[3]
Barney's locker has two personal photos, two fictional books titled Government Conspiracies and The Truth About Aliens by RH, a nod to Rob Heironimus. Gordon Freeman also has a copy of this book in his bedroom, as seen in Decay. The last item is a small cardboard box. When destroyed, it reveals a Chumtoad. The player can only break the box by using all the ammunition that is available in the level.
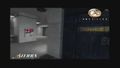
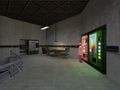
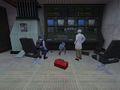
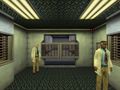
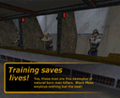
When the camera that shows Gordon Freeman is used six times in the surveillance room, it triggers a scripted sequence where one of the scientists dance while the other watches him. In the lobby, there is an advertisement poster with a photo of the shooting range. The very small text on the poster says "Yes, those men are fine examples of natural born man killers. Black Mesa employs nothing but the best!".
The bridge
In the cut Decay mission, Central Transit Hub, the players would use a bridge to crush a Gargantua to destroy it. The design for this bridge appears to be similar to the one found in the maintenance area of the chapter. It is unknown if they recycled the same brushwork.
Behind the scenes
According to Randy Pitchford, the elevator ride sequence was created by Rob Heironimus, who spent his time during Blue Shift's development solely on perfecting it.[1]
Trivia
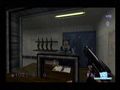
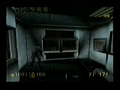
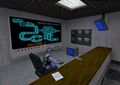
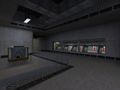
The player can monitor several interesting key areas from the video surveillance room. These show Gordon Freeman when he is heading to the locker room to get his protective suit, Gina Cross when she is delivering the crystal sample to the test chamber, and the armory nearby.
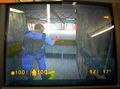
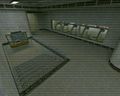
The overweight security guard variant from Opposing Force appears in the shooting range. The G-Man is seen in a tram passing by when Barney is going through a maintenance area. This is his only appearance in the game. The level code for the chapter is Barney Goes to Work in the Dreamcast version.
Gallery
At least one image in this gallery is not captioned. You can help by describing the files below. |
Pre-release
Gordon in a tram.
Ditto.
Ditto.
Ditto.

The entrance.

Ditto.
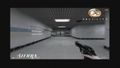
Ditto.
Security checkpoint.
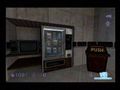
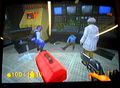
Refreshments.
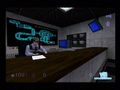
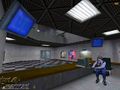
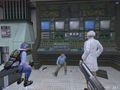
The lobby.

Ditto.
Ditto.
Ditto.
The reception desk.
Ditto.
Ditto.
Ditto.

The locker room.
Ditto.
Ditto.
Ditto.
Barney's locker.
Ditto.
Ditto.
Ditto.
Ditto.

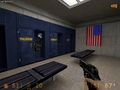
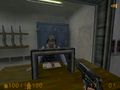
The armory.
Ditto.
Ditto.
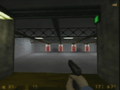
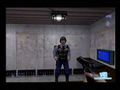
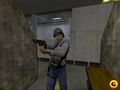
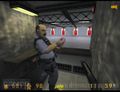
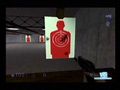
The shooting range.
Ditto.

Ditto.
Ditto.
Ditto.
Ditto.
Ditto.
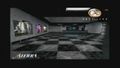
Sector G Main Access Lift.
Ditto.
Ditto.
Ditto.
Ditto.


Retail
Gordon in a tram.
Ditto, nodding.

Security checkpoint.
Refreshments.

The lobby.
The reception desk.
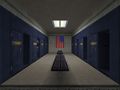
The locker room.
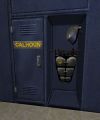
Barney's locker.
Ditto.
The armory.

Ditto.
The shooting range.
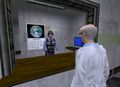
Scientist working on a malfunctioning computer.

Sector C tram station.
The G-Man in a tram.
Sector G tram station.
Sector G Main Access Lift.


Other
Advertisement.

Ditto.
Ditto.
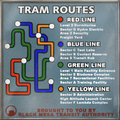
Tram Routes map.
The Chumtoad.
Gordon on a camera.
Gina on a camera.
The armory on a camera.
Dancing scientist.
The overweight guard.


Associated media
 Additional images related to Insecurity
- Half-Life: Blue Shift (Dreamcast port) soundtrack, Steam in the Pipes
References
- ↑ 1.0 1.1
 Unforeseen Consequences: A Half-Life Documentary on YouTube
- ↑ 2.0 2.1 David Mertz's personal website
- ↑ John Faulkenbury's comment on The Easter Egg Archive