Portal 2 storyline
| Warning! This article has yet to be cleaned up to a higher standard of quality, per our Cleanup Project. It may contain factual errors and nonsense, as well as spelling, grammar and structure issues, or simply structure problems. Reader's discretion is advised until fixing is done. | ||
|---|---|---|
You can help clean up this page by correcting spelling and grammar, removing factual errors and rewriting sections to ensure they are clear and concise, and moving some elements when appropriate. |
| This article would greatly benefit from the addition of one or more new images. | ||
|---|---|---|
Please upload one or several relevant images (from canonical / official sources) and place it here. Once finished, this notice may be removed. |
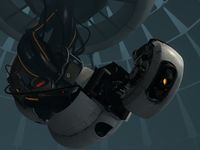
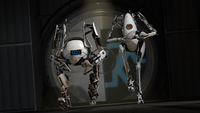
Portal 2 almost directly follows the events of Portal from Chell's perspective, although being set several years (possibly decades or centuries) after the events of Portal. The co-op portion of the game follows ATLAS and P-body, whom GLaDOS accompanies through the Cooperation Testing Initiative.
Contents
Single-player campaign[edit]
The single-player campaign is set directly after Portal and Portal 2: Lab Rat, and right before the cooperative campaign.
Prologue[edit]
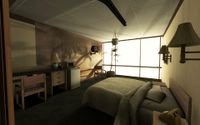
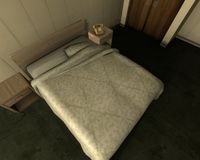
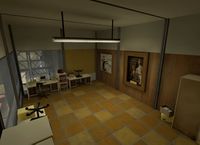
Fifty days after she is put in stasis, Chell is awakened by an unidentified announcer. In compliance with "state and federal regulations," Chell is instructed to perform a mandatory physical and mental wellness exercise which is used to teach the player the standard controls. Chell is then instructed to return to bed.
Chapter 1: The Courtesy Call[edit]
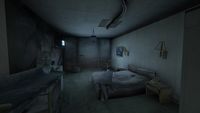
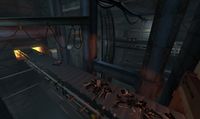
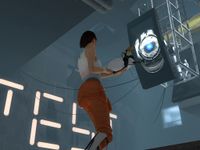
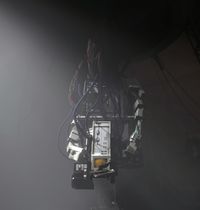
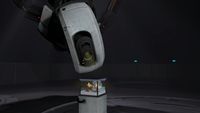
More than 50,000 years later Chell is awakened again, the announcer beginning his same greeting only to break down as it attempts to count out the duration of her stasis sleep. During this second awakening Chell meets Wheatley for the first time. Chell learns that the facility's reserve power has been lost and is instructed to prepare for reactor core meltdown. Wheatley, fearing he will be blamed by "management" for the incident, plans to escape. He smashes the chamber through a wall and tells Chell to look for "a gun that makes holes." The Aperture Science facility is overgrown and badly damaged. During the escape attempt GLaDOS is accidentally reawakened and promptly resumes forcing Chell to complete test chambers.
This chapter includes:
- Aperture Science Extended Relaxation Center.
- Decrepit Test Chamber 00 through decrepit Test Chamber 08.
- Central AI Chamber and Main Breaker Room.
- Incinerator Room.
- Decrepit Test Chamber 19.
Chapter 2: The Cold Boot[edit]
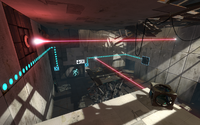
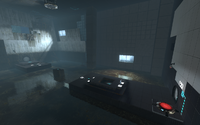
GLaDOS introduces new tests. They primarily include Thermal Discouragement Beams and Aerial Faith Plates. This chapter includes GLaDOS' Test Chambers 01 to 08.
Chapter 3: The Return[edit]
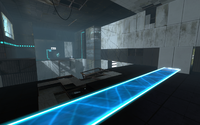
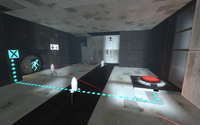
Chell is put through more tests. The Hard Light Bridge and Sentry Turrets are introduced.
Meanwhile, Wheatley formulates a plan to escape. GLaDOS spouts out information regarding the building, as well as attempting to trick Chell once more. GLaDOS also mentions of finding two people with Chell's last name, coincidentally a man and a woman.
This chapter includes GLaDOS' Test Chambers 09 to 17.
Chapter 4: The Surprise[edit]
Chell is given a "surprise" as hinted by GLaDOS, which is the complete absence of one.
Meanwhile, GLaDOS once again attempts to make Chell stop by making her feel bad, especially now GLaDOS decides to include Chell's unknown parents into their conversations.
Chapter 5: The Escape[edit]
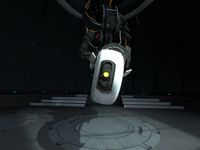
Before GLaDOS can kill Chell, she and Wheatley escape. They eventually sabotage GLaDOS' turret and neurotoxin manufacturing facilities. Chell and Wheatley force a core transfer on GLaDOS so that Wheatley can take control of the facility so they can both escape.
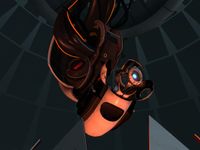
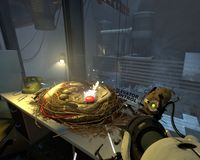
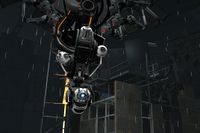
However, Wheatley becomes enraged when GLaDOS tells him that he did nothing and that Chell did all the work. He then transfers GLaDOS into a potato battery. Afterwards, GLaDOS explains that the scientists of Aperture Science created Wheatley purely to slow GLaDOS down by giving her a constant stream of bad ideas. However, GLaDOS takes it too far and calls him a moron, prompting him to throw GLaDOS into the lift with Chell and smash on it with his 'fist', screaming "Could a MORON PUNCH. YOU. INTO. THIS. PIT?! Huh? Could a moron do THAT?" until it breaks and goes into freefall, deep into the bowels of Aperture Laboratories.
Chapter 6: The Fall[edit]
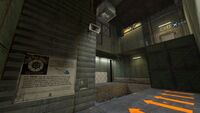
Chell and GLaDOS fall down into Aperture Science's old test areas, back when it was instead known as Aperture Science Innovators, and get separated from each other when a bird snatches GLaDOS and flies away. Chell is guided by pre-recorded messages by Cave Johnson (the former CEO of Aperture Science) and occasionally, his assistant, Caroline. She activates the flow of the Repulsion Gel, and begins testing in the first Enrichment Sphere, where the Repulsion Gel and first designs of boxes, buttons, and switches are shown.
Chapter 7: The Reunion[edit]
Chell manages to find GLaDOS being eaten by a crow. With no other choice, Chell skewers GLaDOS onto her Portal Gun and continues through the Johnson-era test chambers with the AI in tow. As they go up the Enrichment Spheres, they discover that Aperture Science lost money over the years, and witness how the quality of the tests chambers falls dramatically, while they activate the flow of the last two gels.
Meanwhile, as they listen to more of Cave Johnson's recordings, GLaDOS recovers the long-suppressed part of her personality based on Johnson's faithful assistant, Caroline.
Chapter 8: The Itch[edit]
Chell and GLaDOS return near the surface to Wheatley's redesigned Enrichment Center, while making the gels available in the Enrichment Center. Wheatley has taken control, but in his incompetence has failed to maintain the facility's nuclear reactors which are now in meltdown. Instead of properly maintaining the facility, Wheatley has been busy with his own creations such as the cube-turret hybrid known as "Frankenturrets" by developer commentary.
GLaDOS attempts to destroy Wheatley with a logical paradox, but fails due to Wheatley's already-poor grasp of logic. The mad AI forces Chell to go through his own ineptly designed test chambers, followed by more lethal chambers stolen from GLaDOS' collection.
Chapter 9: The Part Where He Kills You[edit]
After several tests, Wheatley finds out about the Cooperative Testing Initiative and takes it upon himself to kill the two. Chell manages to escape thanks to her skill with the portal device and a timely splatter of Conversion Gel.
As they make their way through the maintenance areas, the two come across a cache of un-incinerated corrupt personality cores. GLaDOS makes a plan to force another core transfer in order to return back to her original body, as well as making a deal to release Chell once they do so. Upon reaching Wheatley's chamber, a battle ensues. Chell redirects bombs to Wheatley as GLaDOS delivers corrupt cores. After attaching three cores, Chell increases Wheatley's corruption to one hundred percent. A core transfer takes place but results in another stalemate. Chell reaches for the Substitute Stalemate button, but Wheatley expected this and placed bombs as booby-traps.
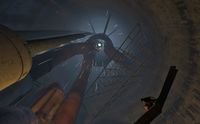
Chell gets thrown across the room as the reactor meltdown enters its final phase, shaking the chamber apart. A full Moon appears through a breach in the roof, allowing Chell to shoot a portal at its surface (Cave Johnson said prior that lunar dust was an excellent portal-conducting surface). The vacuum of space sucks Chell, Wheatley, Rick, and the Space Core through, as Chell hangs onto Wheatley's tethered core to survive. Unseen, GLaDOS successfully performs the core transfer and stabilizes the reactors. She knocks Wheatley out into space and drags Chell back to safety before closing the portal.
The Credits[edit]

In the morning Chell wakes up in an elevator, as GLaDOS, ATLAS and P-body greet her. GLaDOS tells her that "being Caroline" taught her a valuable lesson - that Chell was her best friend. She says she also learned where Caroline lives in her brain, and then promptly claims to have deleted that part. Now back to her usual antagonistic self, GLaDOS concedes that killing Chell has proven to be difficult, and her life was a lot easier before Chell entered it. Therefore, she gives Chell her freedom, on the condition that she doesn't come back.
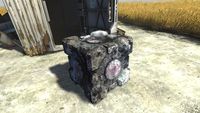
As the elevator rises, an army of turrets sing an opera for Chell as she departs. After finally reaching the surface, Chell steps out from the elevator and into a golden field. Suddenly, Chell's Companion Cube, covered in soot from the incinerator, is hurtled out of the elevator behind her, and the door slams shut.
During the credits, GLaDOS sings a song about the events of Portal 2, claiming that while she used to want Chell dead, now she only 'wants her gone'. However, the lyrics of the song hint that GLaDOS' feelings about Chell may be slightly more conflicted than she'd like to admit, and it appears Caroline may still have a place in her mind.
After the credits, picture zooms out and then it's possible to see that the credits were displayed in space on one of the screens Wheatley used as a shield during the boss battle. Wheatley and the Space Core are floating around. Wheatley then gives a monologue (even though he is interrupted several times by the Space Core), saying that if he could see Chell again, he would apologize for being so bossy and monstrous to her. He then says "the end," and the scene fades into the main menu, where Wheatley and the Space Core still in space in the background.
Cooperative campaign[edit]
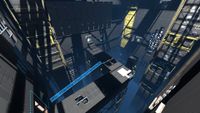
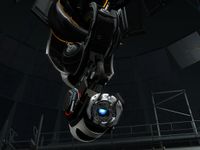
The co-op campaign is set after the events of Portal 2's single player campaign. In it, the two testing androids ATLAS and P-body of the Cooperative Testing Initiative carry out a series of tests in six different courses, each consisting of about eight or nine chambers. At the end of each course, GLaDOS sends the androids outside of the testing chambers and into the facility itself, claiming their help is needed to retrieve several Compact Discs "innocently" left lying around by the humans. In reality, she appears to be using the androids to help her gain control of the facility. After each out-of-chamber task, both androids are self-destructed and then reassembled in the Hub.
Calibration Course[edit]
This section is empty or incomplete. Maybe you can help by expanding it. |
The initial cooperative course whose main purpose is to 'calibrate' ATLAS and P-body for each other, as well as their own controls. During this course, GLaDOS implies the idea that most of this course is a competition of who is faster, as well as initiating her general attitude of creating friction between the two.
Team Building[edit]
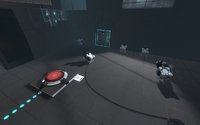
ATLAS and P-body are put through a series of simple tests, designed to promote cooperation and teamwork through the use of Super Buttons and Thermal Discouragement Beams. The final test sends them down to the basement of the facility to activate a targeting computer, which locates a small group of objects.
Mass and Velocity[edit]
This test course focuses on advanced "flinging" techniques, teaching ATLAS and P-body to not only form complex chains using all of their portals, but also timing to allow one to catch an object mid-fling when it is dropped by their partner. The final test involves retrieving a set of blueprints, which GLaDOS states are of no concern to the androids.
Hard Light Surfaces[edit]
The next test course involves the Hard Light Bridges, teaching ATLAS and P-body to use them as both platforms and shields. This is the first course where GLaDOS starts getting bored of the robots basically comparing them to plants and "that isn't science". The final test has them download a security code which GLaDOS attempts to drown out with a series of "blah" noises.
Excursion Funnels[edit]
The Excursion Funnel test course, as with the previous ones, teaches the cooperative use of funnels and their reversal function. In this course GLaDOS tries to break up the two bots by making them think that the other doesn't like them but by the end of the course she realizes that they have no brains and thus she doesn't have to worry about them betraying her. The final test mixes the use of the funnels and Hard Light Bridges as shields in order to reach a power station, which is activated to provide power to the final course.
Mobility Gels[edit]
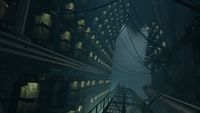
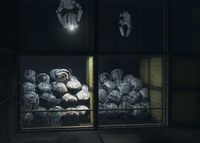
With the previous courses finished, GLaDOS can now access a vault in the lower levels which contains hundreds of human test subjects. She has determined that, given their inability to die, ATLAS and P-body just aren't the same as human test subjects. They are sent to open the vault. These final chambers take elements from all the previous test courses while adding the Aperture Science Mobility Gels as an additional element. In particular, the creative use of Hard Light Bridges and Excursion Funnels in conjunction with the gels is a necessary aspect of completing the test. Upon reaching the vault, ATLAS and P-body open it by making similar gestures to the camera installed on the lock. GLaDOS claims to have more work for them as she destroys them. As the credits roll, GLaDOS scans the identities of the test subjects and makes remarks about them, both positive and negative, though in the end the comments are apparently all directed at one subject.
Portal 2: Peer Review[edit]
Art Therapy[edit]
GLaDOS rebuilds ATLAS and P-body, claiming that 100,000 years have passed since the conclusion of the 'Mobility Gels' course. She also claims (unconvincingly) that all of the humans are still alive. She guides the two of them through a new set of courses (which are supposedly designed to be art exhibitions), though a number of mechanical failures occur, which GLaDOS attempts to cover up.
At the end of Chamber 4 the reassembly machinery fails, forcing ATLAS and P-body to make a detour through an incomplete test track. GLaDOS admits that she has been lying and reverses her original claim of the humans being fine, revealing that she has already killed them all during testing. She also comes clean that it has only been a week since the humans were "rescued," not 100,000 years.
GLaDOS believes that "she" (Chell) has returned and has gained control of an old mainframe chassis, posing a threat to the facility. ATLAS and P-body spend the remaining chambers being "trained" as killing machines, though this merely involves solving further tests and being plied with generic insults. In the final chamber, GLaDOS informs the two that the reassembly machines have broken down and that if she doesn't regain control, their next deaths will be permanent.
The robots reach the chassis, but find that it is being controlled mindlessly by a crow nesting. Despite GLaDOS' calls for a retreat (due to her phobia of birds following her experiences as a potato), ATLAS shoos the bird from the control panel and P-body manages to lock it out of the facility. GLaDOS then notices that the crow had been harbouring three eggs, which she hatches in a "oviparous warming vault," planning to breed the chicks as "little killing machines". This reinforces speculation of using birds as test subjects as seen in Portal.
Trivia[edit]
- Chapter 9 is only given a full name when it is reached; before that it is only known as "The Part Where..." However, the full name of the achievement for reaching this chapter (which shares its name) is always visible, often spoiling the game's story for players hunting achievements in their first play-through. However, on console versions, the achievement has been shortened to "The Part Where..." until it is unlocked by the player and is displayed on screen by the console. For the rest of the time the full name is given unless when one is comparing it with someone else's achievements. Futhermore, the description for the consoles changes after it is unlocked from "This is that part" to something else.
- During the prologue, the first time you look at the art on the wall it shows a cabin and some mountains. After waking up for the second time, if you look at the art a moon will be painted on it, effectively foreshadowing the ending sequence. Also, still after Chell's second awakening, a howling wolf can be seen to have appeared at the bottom of the wallpaper next to the fridge; it was not there before. It is not sure what this means, except that it adds to the ominous feeling surrounding the events.
- At the very end of Chapter 6, it is possible to completely skip over the part where the player saves GLaDOS from the bird. Using some well aimed portals, it is possible to fling yourself over to the elevator. This does not affect the story, as when the next screen appears, GLaDOS is on the prong of the portal gun.
- A developer commentary node near the beginning of the game states that there is an impossible space in the game. This space can be found in Chapter 9, being in the form of the large, movable room where the failed Turret ambush takes place.
- Though it's unclear how many years have passed since the end of Portal, it appears that by now the Combine invasion has passed, possibly following Half-Life 2, or the Combine have left or been destroyed altogether, as GLaDOS mentions seeing humans outside the Enrichment Center, implying that they are no longer enslaved by the Combine, or possible members of the Resistance. However, she could have been lying.
