Half-Life: Decay storyline
This article describes the Half-Life: Decay storyline, mission by mission.
Gina Cross and Colette Green are members of a different team in Black Mesa than Half-Life's protagonist, Gordon Freeman. They are responsible for monitoring the equipment which Gordon uses during the experiment, and are in turn monitored by Dr. Rosenberg and Dr. Keller. Like Gordon, they are forced to fight for survival in the aftermath of the Resonance Cascade.
Contents
Mission 1: Dual Access[edit]
- "The experiment must be successful. Monitor the anti-mass spectrometer and deliver anomalous materials to Dr. Freeman."
- ― Briefing
Synopsis[edit]
In the first mission, Gina Cross and Colette Green deliver the test sample to Gordon and activate the Anti-Mass Spectrometer, shortly before the "incident" (Resonance Cascade) occurs.
Plot[edit]
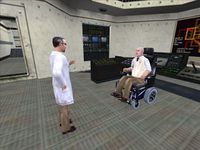
The chapter begins with Gina and Colette arriving at the Anomalous Materials department right on time, in contrast to Gordon being late in Half-Life. They are greeted by a security guard, who comments on how today is "the big day" and they will be working with the "new guy, Dr. Freeman". He also explains that a recent system crash may have wiped them from the security system, so they'll have to sign back in in the next room. After getting scanned and re-added to the security system, the two Doctors head to the Anomalous Materials control room. Dr. Keller greets them but shows his annoyance at Freeman's lateness, saying "[he does] not understand what Kleiner sees in that boy". Dr. Rosenberg then enters the control room and displays his disapproval at the Anti-Mass Spectrometer being pushed to such a high power capacity for the analysis. However, he caves in after Dr. Keller says it is not his decision and if he doesn't wish to see the experiment he can go back to "[his] little labs over by the train yard".
Cross and Green go down to their respective areas for the experiment. Gina goes to the delivery chute to push the sample up to Gordon, and Colette goes into the lower area of the test chamber to turn on the power and set it to 80%. After Gina fixes a small problem in which a crowbar was mysteriously jammed inside the delivery chute's mechanism, the sample is moved up to Freeman and the Resonance Cascade occurs. Cross and Green black out for a period of time, and wake up to see the lower part of the test chamber in shambles. They hear Dr. Keller and Rosenberg over the intercom, who discuss what to do. Dr. Rosenberg is intent on saving the personnel in the facility, while Dr. Keller wants to fix the tear created by the resonance cascade, saying they caused this mess and should be responsible for fixing it.
After finding pistols and fighting their way through part of the laboratory, the two doctors make their way back to the control room. Keller and Rosenberg tell them they have reached an agreement. They will escort Dr. Rosenberg up to the surface to call the military, and Keller will stay below to assess the damage made to the equipment. With any luck, he'll be able to find what caused the experiment to go wrong and how they can put things right. Dr. Cross, Green and Rosenberg enter the elevator to get to the surface through the Hazard Course, and the mission ends.
Trivia[edit]
On the way to the control room, the G-Man can be seen in an elevator beside one the players are riding in. This is the only mission in which the G-Man is seen.
Mission 2: Hazardous Course[edit]
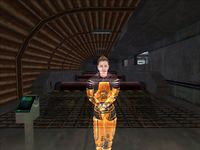
- "Survivors must call for help. Escort Dr. Rosenberg through the training area to the surface."
- ― Briefing
Gina and Colette must escort Dr. Rosenberg through the Hazard Course in the Training Facility to the surface in order to call for military assistance.
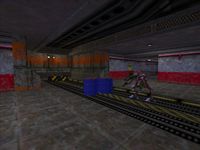
Dr. Cross and Green make it to an observation room of the Hazard course with Rosenberg. However, the lift to the surface isn't functioning, so Gina and Colette must venture through the now derelict training areas in order to get down to the maintenance shaft and raise the lift manually. They head through multiple portions of the course, now in terrible condition due to the Resonance Cascade. Once they get to the maintenance area, they raise the lift using a lever system and climb back up to the lift where Rosenberg is waiting. They fight and destroy two sentries which are out of control and shooting anyone on sight, kill a zombie after the door and get to the train at the end of the course. Rosenberg thanks them for helping him through the course, and the mission ends.
Mission 3: Surface Call[edit]
- "To call for help, survivors need active communications. Help Dr. Rosenberg establish an uplink with the outside world."
- ― Briefing
Gina, Colette, and Rosenberg reach the surface, with the objective of accessing the Satellite Communications Center to contact the military, as Rosenberg hopes that they will secure the facility and escort the personnel to safety. However, they find the front door to the Comm Center locked, forcing Gina and Colette to circle around through nearby warehouses to get to the unlocked back entrance. Once inside, they manually align the satellite dish and Rosenberg successfully contacts the military while Gina and Colette head back down to Sector C.
Mission 4: Resonance[edit]
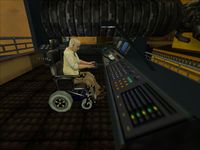
- "The rift between Earth and the alien world is widening. Reset the dampening fields to prevent another cascade."
- ― Briefing
Gina and Colette return to Anomalous Materials and link back up with Dr. Keller. Dr. Keller decides that the best course of action is to re-engage the dampening fields, which he felt would end the Resonance Cascade. To do this, Gina and Colette travel through the facility and successfully reset the secondary and primary dampening locks. However, the dampening fields fail soon after. Keller discovers that the failure was caused by intentional interference from the other side of the rifts and realizes that not all the aliens might be there by accident.
Mission 5: Domestic Violence[edit]
- "A satellite controls major recovery systems. Locate a security guard who knows the satellite signal codes."
- ― Briefing
Keller hatches a plan to create a resonance reversal using the prototype displacement beacon in the Gamma Labs. However, he needs a satellite in orbit before he can go through with the plan. Personnel in the High Altitude Launch Center are ready to launch the satellite, but due to a military air traffic lockdown that is in effect they can not. To remove the lockdown, an all-clear code is needed. Keller, Colette, and Gina use the transit system to get to the nearby Level 3 Dormitories. There, they begin searching for a security guard with the codes. Their task is made more difficult by the fact that HECU soldiers are also present, and are busy eliminating science and security personnel. Eventually, the security guard is found. Armed with the codes, Gina, Colette, and Keller travel to the Black Mesa Air Control facility on the surface.
Mission 6: Code Green[edit]
- "A satellite must be in orbit for recovery systems to operate. Upload the satellite signal codes before the delivery rocket launches."
- ― Briefing
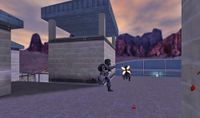
Gina and Colette, after several fights with HECU soldiers and after successfully fighting off an Osprey Heliplane, manage to secure the Black Mesa Air Control building. They proceed to enter the all-clear codes and lift the military air-traffic lockdown. They then return to Keller and head back underground to find a way to the Gamma Labs.
Trivia[edit]
The title of the mission is a reference to Colette's surname.
Mission 7: Crossfire[edit]
- "Prototype equipment must be used to seal the dimensional rift. Manually raise the displacement beacon into place."
- ― Briefing
The next task for Gina and Colette is to manually raise the prototype displacement beacon in the Gamma Labs to the surface, so it can be activated. Keller reaches the main lab area, but cannot raise the beacon from where he is because of an obstruction. After accessing the labs via the drainage canals, Gina and Colette travel through the lower levels of the labs, encountering battling HECU soldiers and Xen creatures as they go. They reach the beacon, clear the obstruction blocking it from ascending, and then raise it successfully.
Trivia[edit]
The mission's title is a reference to Gina's surname.
Mission 8: Intensity[edit]
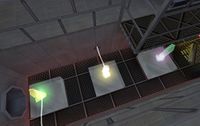
- "The prototype equipment requires huge amounts of energy. Activate the beam matrix to power the displacement beacon."
- ― Briefing
Gina and Colette return to Keller in the lab control area, where he gives them the task of activating the beam matrix system, which provides the power required for the prototype displacement beacon. To do this, they first take an elevator up to the Alien Quarantine Labs, which have become overrun by Xen creatures. After navigating through the labs, they reach the beam matrix and attempt to activate it while simultaneously defending it from Vortigaunts and Grunts, who are rapidly teleporting in. The beam matrix is activated, and Gina and Colette return to Keller, who is making the final preparations for the resonance reversal.
Mission 9: Rift[edit]
- "A resonance reversal may seal the dimensional rift and save the planet. Use the displacement beacon to initiate a reversal."
- ― Briefing
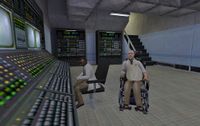
Gina and Colette are forced to defend the displacement beacon against a variety of attacking Xen creatures, including an Alien Craft. In the midst of the battle, both characters are caught in what is explained as a "harmonic reflux" by Dr. Keller. It is during this sequence that the voice of Dr. Rosenberg can be heard warning that he "can't keep the portal open much longer," alluding to Calhoun's coinciding trip in Xen during Blue Shift. Gina and Colette then return safely and Dr. Keller congratulates them on their success.
The resonance reversal presumably had the effect of severely weakening the resonance cascade. It still remains unclear whether the doctors managed to survive the nuclear explosion that occurs at the end of Opposing Force.
Bonus mission: Xen Attacks[edit]
- "Earthlings have stolen valuable materials for their research. Reclaim the stolen crystals."
- ― Briefing
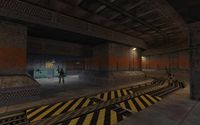
In this bonus mission of Decay, two Vortigaunts named Drone Subjects X-8973 and R-4913 must retrieve the crystal sample which was used in tests (and stolen by the G-Man) in the Black Mesa and take it back to their leader Nihilanth. It is also interesting to note that the level itself is connected to the same parking garage seen near the end of Half-Life: Opposing Force where the nuclear warhead is disarmed by Adrian Shephard and rearmed by the G-Man.
Trivia[edit]
In order to unlock the Bonus mission, an A-grade is required on all nine of the other missions. The ability to play as a Vortigaunt in the main Half-Life singleplayer campaign is also possible through a cheat code which unlocks Alien Mode.
See also[edit]
- Locations in the Half-Life and Portal universe for Half-Life: Decay
- Cut missions from Half-Life: Decay
