The G-Man

| |
| The G-Man | |
|---|---|
| Biographical information | |
| Homeworld |
N/A |
| Function(s) / Belongings | |
| Equipment |
|
| Physical description | |
| Species |
Unknown (humanoid in appearance) |
| Gender |
Male (in appearance) |
| Hair color |
Dark brown |
| Eye color |
|
| Chronological and political information | |
| Faction |
N/A |
| Game information | |
| Voiced by | |
| Modeled over |
Frank Sheldon (HL2)[1] |
| Designer(s) |
Half-Life
Half-Life 2
Half-Life: Alyx |
| Entity |
|
| Voice sample(s) | |
|
Half-Life:
Half-Life 2:
Half-Life: Alyx: | |
- "Some believe the fate of our worlds is inflexible. My employers disagree. They authorize me to... nudge things in a particular direction from time to time."
- ― The G-Man[src]
The G-Man is a key, yet mysterious and enigmatic character in the Half-Life series. Referred to as a "sinister interdimensional bureaucrat",[6] he is known to display peculiar behavior and capabilities beyond that of an ordinary human, and his identity and motives remain almost completely unexplained. He plays the role of a sponsor,[7][8] overseer, and eventual employer, watching over Gordon Freeman and other characters as the series progresses.
Contents
Biography[edit]
Appearances[edit]
Half-Life[edit]

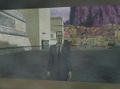
The G-Man is first seen during the Half-Life introduction sequence standing in an electric tram that's stopped on the track along the Sector C Line of the Black Mesa Research Facility. Briefly glimpsed by Gordon, to whom he is the classified administrative sponsor of,[7][8] from a tram on an opposite track, the G-Man manages to arrive at the Sector C Test Labs and Control Facilities before him. Before the experiment begins, the G-Man can be seen engaging in a heated argument with a scientist in a locked, sound-proof room of the Research section of the Anomalous Materials Lab where only mumbling can be heard. Following the catastrophic Resonance Cascade which commences the game's action through Black Mesa, the G-Man can be seen quietly observing Gordon from several out-of-reach areas as the game progresses.
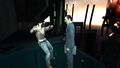
After Gordon defeats the Half-Life final boss, Nihilanth, the ruler of Xen, the G-Man brings the player to "safety" in an inexplicable, abstract sequence, appearing beside Gordon, having stripped him of his armaments, claiming that "most of them were government property". However, he allows Gordon to keep the HEV Suit, stating he believes Gordon has “earned it”. As he shows him various areas of Xen, the G-Man tells Gordon that he has been observing him very carefully and praises him for his actions in Xen, which is now in his "employers'" control. As he says this, dead HECU Marines, destroyed tanks and a downed jet can be seen around this area of Xen, suggesting that U.S. military forces participated in capturing Xen for the G-Man's "employers", although this may merely be part of G-Man's illusions.
Eventually, the scene changes into what appears to be a Black Mesa tram traveling through space at high speed. The G-Man then informs him that he has recommended Gordon's services to his "employers" and offers him a job. The player is given the "illusion of free choice" being reminded of this by the G-Man at the end of Half-Life 2. Regardless of the decision made, there was ultimately only one inevitable outcome.[9]
Half-Life: Opposing Force[edit]

In Opposing Force, the G-Man plays a slightly more direct role in the story, alternately hindering and aiding the player, Corporal Adrian Shephard, as well as simply observing.
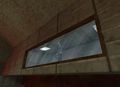
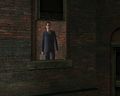
During the boot camp training chapter, the G-Man can be spotted at a window speaking to an officer and occasionally glancing at the player. Since Instructor Barnes mentions that Shephard's training has been mysteriously accelerated, the implication is that the G-Man had an interest in Shephard before the Black Mesa incident, for unknown reasons.
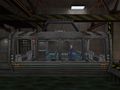
During the chapter Welcome to Black Mesa, Shephard is trapped on a small walkway, with deadly radioactive liquid rising steadily towards him. The G-Man opens a door, allowing him to escape and save his life. One chapter later, "We Are Pulling Out", as Shephard attempts to evacuate Black Mesa with the rest of the marines, the G-Man closes a hangar door, forcing him to remain at the base. Later on in the chapter "The Package", the G-Man is seen rearming the nuclear bomb that destroys Black Mesa, while Shephard had deactivated it moments prior.
After Shephard defeats the Gene Worm at the end of the game, the G-Man appears again. On this occasion, Shephard finds himself on board one of the HECU's Osprey Heliplanes, facing the G-Man. The G-Man informs Shephard that, contrary to his employer's original wishes, Shephard is to be spared, but detained. The G-Man says that he has been impressed by Shephard's ability to "adapt and survive against all odds" in the Black Mesa facility, and comments that these are traits that remind him of himself. As the G-Man delivers this closing monologue, the plane carries them away from Black Mesa, shortly before a nuclear blast flashes outside confirming its destruction. The aircraft's location then suddenly switches to the skies of Xen, then finally to an emptiness similar to that encountered by the Black Mesa tram at the end of Half-Life. The G-Man then leaves Shephard via a portal in the cockpit, and the screen fades to the closing titles.
Half-Life: Blue Shift and Half-Life: Decay[edit]
In both Blue Shift and Decay, the main characters of each game, Barney Calhoun and Doctors Gina Cross and Colette Green, see the G-Man on one occasion near the beginning of each game, but he either doesn't seem to notice any of them, or he simply ignores them.
Half-Life 2[edit]

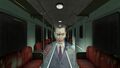
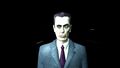
Half-Life 2 begins with Gordon being greeted by the G-Man around 20 years after the Black Mesa Incident while seeing a dream-like montage of images such as the Black Mesa test chamber, and interior areas of the Citadel. In his speech, the G-Man hints that he put Gordon into stasis for his own safety, and that an opportunity has now arisen which will allow Gordon to begin his campaign against the Combine forces on Earth. He continuously refers to Gordon Freeman as "Mister Freeman" throughout the introductory sequence, forgoing Gordon's proper title of doctor. However, during the ending sequence, he refers to Gordon as "Doctor Freeman".
The G-Man is briefly visible at various other points during the events of the game, including along the different vehicle sequences, but these are only from a great distance or as seen on video terminals until the game's finale. After an uphill battle in the Citadel, Gordon causes critical damage to the structure's Dark Energy reactor, resulting in an explosion that might have caused his death, had the G-Man not seemingly stopped time in order to extract Gordon to safety to await further "employment offers" (while apparently leaving Alyx to perish in the explosion). The game ends with travel through the same emptiness that was the Half-Life ending, and with the G-Man stepping through some sort of doorway portal, though not before fixing his tie.
The G-Man, at this point, makes it clear that he will once again be placing Gordon in stasis while he entertains some "interesting offers" for Gordon's services, this time making no mention of his "employers," as he had in Half-Life, justifying that the current situation is "extraordinary" enough to contemplate taking up any of these offers. Before their final showdown, Doctor Breen also asks Gordon, "Did you realize your contract was open to the highest bidder?", probably a reference to the "contract" Gordon has with the G-Man.
Half-Life 2: Episode One[edit]

The G-Man is only seen once in Episode One. At the beginning of the game, which begins at the point when Half-Life 2 ends, he walks back into the black void that he left Gordon in and opens his mouth to say something but then notices a purple glowing Vortigaunt to his left. He appears to be slightly amused at the sight, but then notices another on his right, and the smile drops from his face. As more and more Vortigaunts appear, he begins to look irritated, and then, as he looks toward Gordon, he realizes what is happening. Irritation changes to anger. As two more Vortigaunts stand on either side of Gordon and grab his arms, the G-Man straightens his tie more violently than before and responds to their chant with a single sentence: "We'll see... about that!". Gordon is then immediately teleported away and found by Dog in a pile of rubble just outside the Citadel.
This incident shows the Vortigaunts have the ability to enter the G-Man's realm. This is also the first time any hindrance (definitive or temporary) is seen in the G-Man's plans.
Half-Life 2: Episode Two[edit]

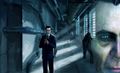
The G-Man first appears to Gordon while a group of Vortigaunts is occupied healing the heavily wounded Alyx Vance. He explains that the reason for his absence is that the Vortigaunts have been preventing him from appearing to Gordon, thus he needed to wait for the Vortigaunts to be preoccupied so that he could contact him. Just like in Half-Life 2, he appears in a surreal, dream-like sequence taking place in several locations: the rocket silo located at White Forest, the same corridor as the one seen in the message left by Judith Mossman, and what seems to be the entrance to the Anomalous Materials Test Labs in the Black Mesa Research Facility from Half-Life (it might also be another entrance, but this place being a striking Half-Life element, the differences seen are likely just aesthetic and related to the different game engine). He then explains that he was the one to "pluck" Alyx Vance from Black Mesa, despite objections from unidentified naysayers that she was "a mere child" and "of no practical use to anyone" (an image of Doctor Breen flashes in the background at this comment). He then instructs Gordon to safely escort Alyx to White Forest, as repayment for the G-Man's previous ensurance of his survival, stating he wished he could do more than simply monitor Gordon, but has agreed to "abide by certain restrictions." While Alyx is still unconscious, he then whispers into her ear to tell her father to "prepare for unforeseen consequences" when she sees him. During the sequence, he seems to be less rigid and more human-like and is not seen carrying his briefcase.
Eli is noticeably disturbed by the words, to the point where he almost collapses in shock. After making up an excuse for Alyx to leave the room, Eli reveals to Gordon that he is aware of their "mutual friend" as well. He explains that the G-Man delivered sample GG-3883 which ultimately caused the Black Mesa Incident, and whispered in his ear to "prepare for unforeseen consequences" shortly before the Resonance Cascade. Eli then begins to express hope that he and Gordon will be able to take some unknown action, but is interrupted by Alyx's return. Shortly after, Eli tells Gordon he believes the message is a warning regarding the Borealis, and reiterates his belief that it should be destroyed lest the events of Black Mesa repeat themselves. Whatever Eli knew is left unsaid, as he is killed by a Combine Advisor before having the opportunity to elaborate further.
Half-Life: Alyx[edit]
Five years prior to the return of Gordon Freeman and during construction of the Citadel, the Combine manage to track an unknown figure of importance to an apartment building located in City 17. The Combine haphazardly contain this individual by taking the whole building and constructing a Vault around it. The Vault itself is left hovering over the Quarantine Zone, powered by energy harvested from Vortigaunts held captive in substations. The Combine made plans to relocate the Vault but were having delays for unknown reasons. After discovering the Vault and believing the individual held inside to be Gordon, Eli and Alyx Vance set out to release him. Just before Alyx enters the Vault, Eli realizes that there's danger and attempts to warn Alyx, but is too late as the signal breaks up just as she proceeds. Despite the Combine's efforts to stop her, Alyx manages to infiltrate the Vault. Alyx opens the shielded cell, revealing the captive to be the G-Man. The G-Man makes an offer to Alyx, showing her a vision of the future where her father is killed by an Advisor at White Forest during the events of Episode Two. The G-Man lets Alyx intervene, saving Eli and killing the Advisor. He then tells her that she has proven herself “to be of extraordinary value” and would be a good replacement for another who has failed or refused to do his bidding, showing her a glimpse of Gordon.
Due to Alyx's actions, Eli's death in Episode Two is prevented. However, Alyx is now missing, having been taken by the G-Man and put into stasis to "await assignment." Realizing what has happened, Eli expresses his anger, vowing to kill the G-Man for this. As Eli hands Gordon his crowbar, the G-Man himself can be seen watching the scene unfold before turning and walking away, vanishing in the process.
Appearance and speech[edit]

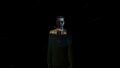
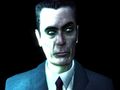
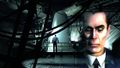
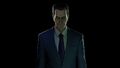
Physically, the G-Man appears to be a middle-aged Caucasian male with a tall, thin physique, pale skin, a prominent widow's peak, black hair shaped in a military-style crew cut, and pale green eyes. Throughout the entire Half-Life series, he is seen dressed in a gray/blue suit with a purple tie, except in the High Definition Pack where his tie is striped red and black. He is almost always seen carrying a briefcase.
The G-Man speaks in a slow, raspy yet commanding manner, with a certain accentuated low-key moroseness to his tone, bordering on the cryptic. He also has an odd habit of placing unusual stress on syllables, stressing the wrong parts of words, making unneeded pauses, and awkwardly changing the pitch of his voice. He also has a tendency to elongate consonants, especially the "S". His speech is rhotic and sometimes keeps the wine-whine distinction.
Personality and skills[edit]

The G-Man can best be described as an enigma. In the Half-Life Audio Script, he is referred to as follows: "The cryptical bureaucrat, mystery man with a briefcase. He appears in the shadows, disappears when you chase him down dead-end corridors. He leads you into danger and guides you to safety, as the whim strikes him. His motives remain mysterious, but at the end of the game, when you have extinguished an alien civilization, he offers you a job with whoever it is he works for."[10]
The G-Man possesses a calm, almost disinterested demeanor, particularly apparent in the ruined and alien-infested Black Mesa facility. He can often be seen calmly straightening his tie or brushing his suit lapels with his hands, regardless of whatever chaos may be going on around him. He also has a bit of a dry sense of humor.
He has stepped in directly and rescued Adrian Shephard and Alyx Vance before the destruction of Black Mesa, suggesting that he is capable of mercy, though it is more likely that he merely did this for his own interests.
The G-Man thus far seems to be a master of manipulation, having created pawns of Gordon, Alyx, and Adrian thus far and perhaps countless others. It is also implied that he orchestrated the Black Mesa Incident, suggesting that Dr. Breen may also have been under his influence. He is also shown to be capable of forgiveness and not one to hold a grudge. Even when the Vortigaunts interfere, he later seems confident of his planning once again when he appears in Episode Two; the mild level of ire he earlier displayed when the Vortigaunts abducted Gordon is gone, implying the Vortigaunts actions have not significantly derailed whatever he has planned and has let the earlier transgression go. The G-Man even shows a hint of amusement at the notion that Gordon and the Vortigaunts are now allies.
The G-Man shows respect for people who can survive against incredible odds, citing that such people remind him of himself. His message to Eli mentioning "unforeseen consequences" and the subsequent revelation about the threat to humanity posed by the Combine acquiring the technology on board the Borealis could imply that the G-Man might secretly be sympathetic to humanity and its fight for survival.

He also appears quite technically skilled and is capable of operating a very wide range of machinery and technology, ranging from simple cell phones and sealed steel doors to complex nuclear weapons (although for the latter there are instructions inside the cap) and experimental teleports and portals.[11]
Throughout the entire Half-Life series, the G-Man has a tendency to appear in an out-of-the-way or hard-to-reach location and then walk away and vanish without a trace once the player arrives. He is seen twice using portals,[12] perhaps explaining his ability to appear and disappear apparently randomly. The G-Man also seems to be able to manipulate time to a degree, as he momentarily stops the dark fusion reactor's explosion at the end of Half-Life 2.
In most games featuring the G-Man, there are several sequences when the G-Man is talking at close range to the player, and various areas can be seen in the background, including areas from Black Mesa or even areas the player will visit later into the game. In these sequences, the G-Man talks to the player and can be seen quickly appearing in different portions of the screen, in dream-like sequences. He also appears on TV screens and "Breen Casts" dotted around the environment; G-Man also seems to have technopathic or telepathic abilities of some sort, as the player will occasionally see his face on things such as unplugged televisions.
In Half-Life: Alyx, the G-Man is shown to be aware of future events, capable of time travel, and of changing established events in the timeline. However, he can only do so following the interest of his employers and under their authorization. He also has the ability to multiply images of himself.
People aware of the G-Man[edit]

The G-Man is seen talking to various people, and yet at times, it seems that only the player is able to see him. However, a few characters other than Gordon Freeman seem to be aware of his existence or have interacted with him. Besides the many unnamed security, military, and science personnel in Black Mesa seen interacting with the G-Man, the characters include:
- Gordon Freeman: Interacts with the G-Man throughout the games.
- Adrian Shephard: He has many encounters with the G-Man during Opposing Force, from the training chapter to the ending sequence, mirroring that of the original game.
- Barney Calhoun: Saw the G-Man at Black Mesa.
- Colette Green: Saw the G-Man at Black Mesa.
- Gina Cross: Saw the G-Man at Black Mesa.
- Nihilanth: While Gordon Freeman was searching Xen for the Nihilanth, the creature could be heard transmitting various telepathic messages to him, including "You are man... he is not man... for you he waits, for you...". This seems to indicate that the Nihilanth was quite aware of the G-Man and forebodes Gordon's eventual "employment" by him, almost ironically "warning" Gordon.
- Wallace Breen: As seen from one of breencasts at Nova Prospekt, in which he says "I have good reason to believe that in the intervening years, he was in a state that precluded further development of covert skills", indicating he might be aware of Gordon being located in stasis between the events of HL1 and HL2, and as seen by various statements given by Breen at the end of Half-Life 2 as well, such as Gordon having "proven himself a fine pawn for those who control him" and his "contract is open to the highest bidder", it would appear that he was well aware of the G-Man's influence over Gordon. However, when Alyx questions this, he whispers that Gordon does not want to discuss this in front of his friends, suggesting that, at this point, Alyx is not yet aware of the G-Man's existence.
- The Vortigaunts: In Episode One, Vortigaunts are seen entering the G-Man's realm and liberating Gordon from his control, leading to an irritated "We'll see... about that!" from the G-Man. They also appear to be able to hold him back or force him away, since the G-Man later tells Gordon that he "had to wait until your friends were otherwise occupied" before being able to speak to him. G-Man does not seem to hold a grudge against Gordon or the Vortigaunts for this delay in his plans, even showing a hint of amusement at the notion of them being allies now.
- Eli Vance: In Episode Two, Eli is visibly disturbed after Alyx delivers G-Man's message. Being much warier of him compared to other characters, Eli tells Gordon that the crystal sample for the test that would produce the Resonance Cascade was delivered by the G-Man, further referring to the character as "our mutual friend". He was about to issue a proposal to Gordon regarding the G-Man in some way, but he is interrupted before Gordon is told. In the post-credits scene of Half-Life: Alyx, Eli wakes up Gordon and expresses the urge to kill the G-Man while appearing to look in his direction, handing Gordon his famous crowbar and saying the line "Come on Gordon, we've got work to do."
- Joe: In the Half-Life 2 chapter Route Kanal, when Gordon drops down into a boxcar, the G-Man can be seen on a television screen being powered by a Vortigaunt. Both Joe, the Rebel, and the Vortigaunt are watching the television before Gordon arrives, and it can therefore be presumed that they are aware of the G-Man's existence. Moreover, before Gordon leaves the car, the Vortigaunt says, cryptically, "We serve the same mystery," again hinting at his awareness of the G-Man.
- Odessa Cubbage: The G-Man can be witnessed speaking with the Colonel in the Half-Life 2 chapter Highway 17, by using Combine Binoculars. However, Odessa Cubbage never mentions him. His outpost is warned to expect a Combine Gunship by the time Gordon reaches the outpost, though, suggesting that G-Man may have warned Cubbage.
- The Scientist: This unnamed collaborator with the Combine expresses familiarity with the events of Black Mesa and the G-Man's role during it.
- Alyx Vance: When she is wounded in Episode Two, the G-Man gives her a subliminal message to be delivered to her father. It is, however, unknown if she is actually aware of his existence. As an infant, she was also apparently directly rescued from the destruction of Black Mesa by the G-Man, which she does not seem to remember. During the events of Alyx, set five years prior to Gordon's return, Alyx enters a Vault to free who she believes is Gordon being held prisoner within. Upon opening the cell, the prisoner is revealed to actually be the G-Man. He shows her a vision of the future where her father is killed and lets her intervene, changing his fate. After Eli is saved, Alyx is taken by the G-Man and put into stasis to "await assignment" much like Gordon once was.
- Combine Advisors: While not directly stated, it is likely the Advisors were aware of the G-Man and his capabilities, keeping him contained in a highly secured Vault for that purpose. The Scientist's conversation with an Advisor also hints at their knowledge of the G-Man.
Objects[edit]
Briefcase[edit]
With the exception of the opening sequence in Episode One and the Episode Two sequence, the G-Man is always seen carrying a briefcase, and its contents have often been debated. In the original Half-Life, using the noclip cheat, or with the aid of a model/texture viewer, it is possible to see its contents. However, since the contents of the briefcase are never seen during the game, they may constitute nothing more than an Easter egg. These contents appear to be as follows: Three pencils, one sheet of paper, a handgun in a holster, and an identity card. The inside of the briefcase is blank in all other versions.
In one of Marc Laidlaw's story drafts, the G-Man makes his employment offer to Gordon by opening his briefcase to reveal a dimensional portal.
In Half-Life: Alyx, the G-Man presents his briefcase to Alyx Vance as an offer "you don't know you want". Upon touching it, she sees the future where her father Eli is killed.

Texture of the briefcase contents.

Ditto.

The Black Mesa logo as seen on the briefcase.


Other objects[edit]
Near the dam where a Gargantua is restrained in the Opposing Force chapter Foxtrot Uniform, the G-Man is seen for a moment talking on a cellphone before disappearing into a portal.
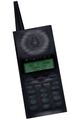
Cellphone model.

List of exact in-game locations[edit]
- "I wish I could do more than keep an eye on you, but I have agreed to abide by certain... restrictions."
- ― The G-Man[src]
The G-Man is notable for appearing several times in each game, often in out-of-the-way locations. It may be difficult for a first-time player to see him, and it is almost universally impossible to go directly to where he is standing. When it is possible, he always disappears from that place before the player is able to reach it. If fired upon, he is always unharmed and never reacts to the shot. In the Half-Life chapter Lambda Core, it is learned that the G-Man is able to suddenly disappear by using portals.
This list does not include the introduction and ending sequences in which he speaks to the player character directly.
Half-Life[edit]
- Black Mesa Inbound (
c0a0d): When the tram Gordon is riding pauses briefly, the G-Man can be seen standing with a scientist in another tram frozen on the track. - Anomalous Materials (
c1a0): The G-Man can be seen standing in an inaccessible room arguing with a scientist, where only a looping sound of mumbling can be heard (the words will still be impossible to hear even when noclipping inside the room).
- Unforeseen Consequences (
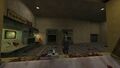
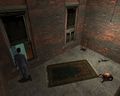
c1a1b): In his first appearance following the Resonance Cascade, he can be seen watching Gordon from a catwalk. When Gordon arrives at the same spot, it is revealed that the G-Man disappeared at an apparent dead end, where a Zombie is eating a dead scientist. - Office Complex (
c1a2b): As Gordon battles his way out of the office complex, the G-Man can be seen behind a locked door, watching. As usual, he straightens his tie, brushes his suit with his hand, and walks off along a balcony over a corpse-filled cafeteria visited before by the player (he appears only when the player visits the map for the second time, after going through cold storage rooms). - We've Got Hostiles (
c1a3d): Immediately before Gordon's first encounter with the HECU Marines, the G-Man is seen on a high catwalk, apparently heading towards the soldiers. However, when Gordon arrives at the same spot, the Marines have only just arrived, whilst a nearby scientist does not mention having seen him. - Power Up (
c2a1): When Gordon arrives at Sector E Track Control, he sees the G-Man watching him from a control room. By the time Gordon gets there, though, the control room is boarded up from the outside, and a wounded security guard there indicates no sign of having seen him. - Apprehension (
c2a3b): In a large room filled with industrial pistons, the G-Man can be seen at the far end of the room. He leaves in a direction which leads to several hostile aliens and soldiers. - Lambda Core (
c3a2c): In the deserted Lambda Complex, Gordon watches through a window into a deserted room filled with Headcrabs. The G-Man, standing on a raised floor, briefly looks at Gordon before stepping into a glowing portal. This is the first time the player sees the G-Man using portals, explaining how he has been able to so quickly get around the complex and disappear (especially into the aforementioned dead ends) before the player was ever able to reach him.
In Black Mesa Inbound.
In Anomalous Materials.

In Unforeseen Consequences.
In Office Complex.

In We've Got Hostiles.
In Power Up.
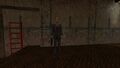
In Apprehension.
In Lambda Core.


Half-Life: Uplink[edit]
Uplink (hldemo1): At the very end of the demo, Gordon arrives in a large room filled with computers. A Gargantua breaks in and begins killing the hiding personnel. As the monster wreaks havoc, the G-Man calmly watches from a corridor, straightens his tie, and, as the Gargantua approaches Gordon, slowly strolls away.
In Uplink.

Half-Life: Opposing Force[edit]
- Boot Camp (
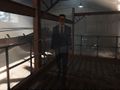
ofboot1): The G-Man and a soldier can be seen standing in a room in the Tactical Operations Command building. - Welcome to Black Mesa (
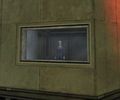
of1a1): In a relatively undamaged area of Black Mesa, Shephard sees through a door the G-Man arguing with a security guard before walking away (using the same animation as in his Anomalous Materials appearance). After G-Man has left, the security guard won't come to the door to open it, and Shephard proceeds to upper levels. - Welcome to Black Mesa (
of1a3): Shephard finds himself trapped in a room that is rapidly filling up with toxic waste. The G-Man can be seen through a window, opening a door after a moment of hesitation, which allows Shephard to escape. Even though Shephard is only meters behind him, the G-Man is nowhere to be found in the next room, which is filled with toxic waste and Xen creatures. - "We Are Pulling Out" (
of1a6): Shephard races towards a transport aircraft as the marines evacuate Black Mesa. As he is sprinting down a corridor towards the plane, the G-Man calmly appears at the end of the corridor and closes a heavy door, trapping Shephard inside. He brushes his suit and strolls away as the evacuation plane takes off. - Pit Worm's Nest (
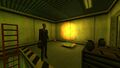
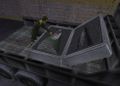
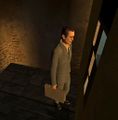
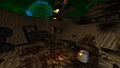
of4a4): When Shephard finds himself in a large garbage compactor, the G-Man can be seen quietly observing him from an observation window. After a short time, he opens the door and leaves. - Foxtrot Uniform (
of5a4): After a battle with Race X aliens, Shephard arrives at the damaged Hydro-Electric Dam where HECU soldiers are firing at a trapped Gargantua. Standing in the intake tower where Gordon climbs into in Half-Life is the G-Man, who finishes a conversation on a cellphone and steps into a portal, where Sprites can also be seen rushing into. - "The Package" (
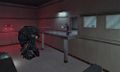
of6a4): Shephard arrives in an underground car park and deactivates a nuclear bomb. After a security guard lets him through a locked door, Shephard sees the G-Man rearming the bomb. If the player attempts to backtrack to the bomb in order to deactivate it again, he will discover that the previously open chain link fence leading there is now locked, making it impossible.
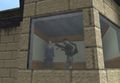
In Boot Camp.
In Welcome to Black Mesa (1).
Ditto, from inside.
In Welcome to Black Mesa (2).
In "We Are Pulling Out".
In Pit Worm's Nest.

In Foxtrot Uniform.
In "The Package".


Half-Life: Blue Shift[edit]
Insecurity (ba_maint): Seen riding on a tram as Calhoun watches from a maintenance area between Sector C and Sector G. He does not seem to notice Barney and is not seen later in the game. Strangely, the scientist seen before mentions that no trams in that area are in operation at the time.
In Insecurity.

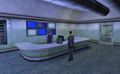
Half-Life: Decay[edit]
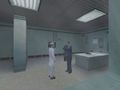
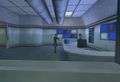
Dual Access (dy_accident1): Riding up in a glass-walled elevator after participating in a security registration scan in Sector C, Gina Cross and Colette Green can see the G-Man pass, riding downward in an adjacent elevator.
In Dual Access.

Half-Life 2[edit]
- Point Insertion (
d1_trainstation_01): Vaguely seen in a large rectangular monitor that flickers his image along with other Breencasts right before Barney is met. This instance only occurs in the Xbox console port. - "A Red Letter Day" (
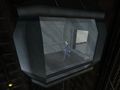
d1_trainstation_05): If the player flips through the main monitor in Kleiner's Lab a few times, eventually it will come across the G-Man staring at the other side of a fence, before walking away. The location can be accessed by noclipping. There, it appears that the G-Man can be killed and that the area is a remainder of a small portion of the start of the trainstation found ind1_trainstation_01in the playable leak, where the incoming train stops. - Route Kanal (
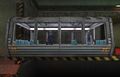
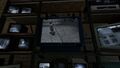
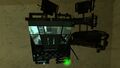
d1_canals_01): In Joe's boxcar, a TV temporarily shows the G-Man, with a Vortigaunt watching and supplying television power. The G-Man appears to be in the same "studio" where Dr. Breen delivers his televised messages to City 17, complete with the Combine's logo. When Gordon falls into the boxcar and gets noticed, the Vortigaunt stops the transmission. - Water Hazard (
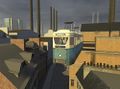
d1_canals_06): He is seen standing on Station 7's walkway. As Gordon approaches, he disappears inside the barn, although it is filled with Zombies. - Water Hazard (
d1_canals_06): Vaguely seen in a large rectangular monitor that flickers his image along with other Breencasts. This image based on G-Man's model was taken from Half-Life 2 leak textures files originally in the E3 2003 video "Psyche".[13] - Water Hazard (
d1_canals_12): Seen overlooking a ledge as Gordon's Airboat passes under. - Water Hazard (
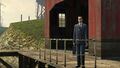
d1_canals_13): Before Black Mesa East, the G-Man can be spotted on a concrete ledge near the gate controls. However, once Gordon turns the wheel to raise the gate blocking his progress, the G-Man is nowhere to be found. Coincidentally, there is a sign pointing to where the G-Man stood which states "Observation". - Black Mesa East (
d1_eli_01): Not the G-Man himself, but an image of his face can be seen at the yellow end of one of the units manned by the Vortigaunt in Eli Vance's lab. Taking a screenshot or using the element's model texture and editing it is required to properly see the face. His face is only in the blue channel of the texture. This was revealed by Dhabih Eng on Twitter in 2019.[14] - "We Don't Go To Ravenholm..." (
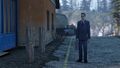
d1_town_05): After leaving Ravenholm, he can barely be seen walking off into a tunnel behind a few train cars, right behind Shorepoint Base. - Highway 17 (
d2_coast_03): Looking through the Combine Binoculars in the second house the player comes to after the Shorepoint tunnel, Gordon can spot the G-Man conversing with Colonel Odessa Cubbage at New Little Odessa. When the player arrives at the base, the G-Man is nowhere to be found. - Nova Prospekt (
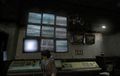
d2_prison_02): Seen walking up to and peering through a door window into a Lambda cache while adjusting his tie as Gordon flips through the monitors near the beginning of the chapter. - Anticitizen One (
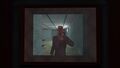
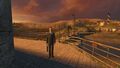
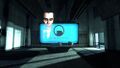
d3_c17_02): After Dog is taken away by a Dropship, Combine Walls start moving towards Gordon and some very discordant music starts playing at the same time in the ruined tenement building nearby. Gordon proceeds to the building and arrives in the same corridor featured at the very start of the mapd1_trainstation_03. Instead of the door leading outside is rubble where can be seen the source of the music: an unplugged television, showing an image of the G-Man standing in a wooden boat with a Crow on his shoulder. The television will shut off right after the G-Man straightens his tie, and the screen will break by itself when the player gets closer, although carrying it with the Gravity Gun will not break it. If the player manually grabs it without the gravity gun, the television will force itself towards the player until released. Later, one of the Rebels' random sentences, "I can't get this tune out of my head!", seems to reference the strange tune heard on the television, since after talking the Rebel whistles similar notes. The sound file of this tune, "radio1.mp3", is located in "sound/music" in the Half-Life 2 sound files. Apparently consisting of loops of two different tracks, bundled with interferences and garbled human voices, it can also be heard in the film 28 Days Later (at 00:26). - Anticitizen One (
d3_c17_03): Similar to the giant rectangular monitor seen in the Canals, the G-Man's image flickers on and off with Doctor Breen's image in the Trainstation Plaza Breencast, before the monitor is toppled by Resistance members, who show no sign of seeing him.
In "A Red Letter Day".

In Route Kanal.
In Water Hazard (1).

In Water Hazard (2).

Ditto (detail of the image).

In Water Hazard (3).
In Water Hazard (4).
In Black Mesa East.

In "We Don't Go To Ravenholm...".

In Highway 17.

Ditto, closeup.
In Nova Prospekt.

In Anticitizen One.

Ditto, viewed by noclipping.

In Anticitizen One (2).


Half-Life 2: Episode One[edit]
There are no G-Man sightings in Episode One apart from his appearance in the introductory scene. This is because he lost track of Gordon[15] and the events of the game are not part of his plan, as suggested by the apparent Vortigaunt intervention in the opening sequence, and the G-Man's notable level of annoyance in the turn of events.
Half-Life 2: Episode Two[edit]
- Freeman Pontifex (
ep2_outland_06): The G-Man can be seen watching Gordon for the first time since the Vortigaunt intervention in Episode One, watching from a bridge before the player goes down to fetch the Muscle Car. He then walks towards a gate and disappears behind a wall. - Under the Radar (
ep2_outland_10): Seen briefly near the White Forest Inn, at the spot where the Muscle Car gets blocked, before walking inside the building. - Our Mutual Fiend (
ep2_outland_11b): The G-Man flickers ominously on the screen which previously showed Dr. Mossman's recording, right before Alyx relays the message to Eli. It should be noted that Alyx is watching the screen as the G-Man appears, implying that it might be the G-Man's reminder/trigger to relay his message.

In Freeman Pontifex.
In Under the Radar.
In Our Mutual Fiend.

Texture (a screenshot of his model, reversed in-game) used for the previous appearance.


Half-Life: Alyx[edit]
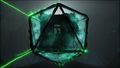
- Entanglement (
a1_intro_world_2): After Alyx escapes her transport with the help of Russell, she begins her travel on foot to his lab. Along the way, she passes a large billboard on the side of the road advertising Occular Recalculation Procedures Inc.. The massive pair of disembodied eyes shown in the advertisement is actually that of the G-Man's. The advertisement itself bears similarity to the billboard for fictional oculist Doctor T. J. Eckleburg described in the novel The Great Gatsby.
- The Quarantine Zone (
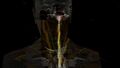
a2_hideout) (mural): While traveling through the Quarantine Zone, Alyx comes across the hideout of Gary, a lone Vortigaunt who has been cut off from the Vortessence due to an invasive procedure performed by the Combine. Now lacking in his perception of time, he has shrouded his hideout in painted murals showing events of both the past and future. Among these paintings is a depiction of the G-Man which is intentionally placed in an obscured and out of the way position, much like the G-Man's typical presence.
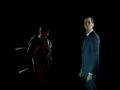
- Point Extraction (
a5_ending): After the climactic ending where Alyx accepts the G-Man's offer, the game features an interactive post-credits scene where Gordon regains consciousness in the hangar where the Episode Two ending occurred, except now Eli is alive while Alyx has disappeared. As Eli curses the G-Man for capturing his daughter, the G-Man himself can be seen watching the scene unfold from a nearby walkway. He then turns around and vanishes as he walks away.

The oculist advertisement billboard.

Ditto, the original texture.
A painting by Gary shows the G-Man looming overhead.

The G-Man stands overlooking the hangar just out of sight of Eli.
The G-Man fades out as he walks away.


Cut locations[edit]
A handful of G-Man appearances are known to have been planned but were cut from the final products.
Half-Life 2[edit]
- Point Insertion (
d1_trainstation_03): The version of that map found in the WC map pack folder "d1_trainstation" features the G-Man riding in front of a tram that flies above the street, mirroring his first appearance in Half-Life.[13] - "We Don't Go To Ravenholm..." (
d1_town_01): The G-Man was originally to be seen in Ravenholm itself, as he can be glimpsed in the mapd1_town_01, one of the original BSPs found in the playable Half-Life 2 leak maps folder. At the start of the map located inside a wooden building, the player has to face a Headcrab and Zombies, to be killed with the propeller trap. After breaking planks barring the way, the player, still in the wooden building, faces a fence and another building beyond it. There the G-Man can be seen through a window before disappearing very quickly. - "We Don't Go To Ravenholm..." (
d1_town_05): The G-Man was to be seen in Ravenholm a second time ind1_town_05(the equivalent ofd1_town_03in the final game), another map of the original BSPs found in the playable Half-Life 2 leak maps folder. There he can be seen again through a window, but he never leaves and cannot be killed. In his dimly lit room can be found a chair, a carpet, a Classic Headcrab (not attacking), and the shotgun with an ammo box (although the room cannot be accessed) on a bed (whose model is missing).
In Point Insertion.

In "We Don't Go To Ravenholm..." (1).
Ditto, from inside.
In "We Don't Go To Ravenholm..." (2).
Ditto, from inside.


Half-Life 2: Episode Two[edit]
- Riding Shotgun (
ep2_outland_08): A removed G-Man appearance would have involved him standing on top of the blocked-off tunnel next to the helicopter fight arena, briefly watching over Gordon before walking away and disappearing.
Related Achievements[edit]
Retail Achievements[edit]
| Half-Life: Alyx | |
|---|---|

|
Consequences |
| Make your choice. | |
Cut Achievements[edit]
Two Orange Box Achievements related to the G-Man were cut from Half-Life 2 and Episode Two.
| Half-Life 2 and Episode Two | |
|---|---|

|
Man of Mystery[16] |
| Find at least one G-Man. | |
| Half-Life 2 | |

|
Eagle Eye[17] |
| Find all of the G-Man's appearances in Half-Life 2. | |
Behind the scenes[edit]

- Originally, all Black Mesa employees in Half-Life were to be hostile to the player. After several tests, allied NPCs showed their usefulness and testers grew fond of their (occasionally bumbling) behaviors. The Black Mesa security guards, as well as large parts of the story, and the main character itself, were rethought. Then, the team came to think about characters that were neither allies nor enemies to the player, leading to the creation of the G-Man.[1]
- The idea behind the G-Man was proposed to Marc Laidlaw by Ken Birdwell, who was thinking about the different functionaries that would exist in an institution like Black Mesa, especially the administrators above the scientists, i.e. the tax guys and the government guys who are checking over the books and representing some other interests; people whose actual nature and function are not clearly determined. The G-Man was developed on that concept.[2]
- "G-Man" is an American slang term for "Government Man," often FBI agents or other obtrusive bureaucrats. However, the G-Man in Half-Life is never identified or referred to by name in any of the games, his name being merely a code name / nickname.[1] That name actually stems from his Half-Life model and entity name, reused in every subsequent games, and is not a fan-created name at all. It has been confirmed and referred to as such in documentaries featuring Valve employees, or the voice actor credits for Half-Life 2 or Raising the Bar. Furthermore, in the manual for Opposing Force, Shephard makes mention of him as "a G-man", although this seems to be as the generic slang term. Also, the pre-release Half-Life model featured the United States Department of Defense logo on the briefcase. Another explanation of the G-Man's nature is given in the comment section of the file "npc_gman.cpp" in the Source SDK file "sourcesdk.gcf", the following is written: "// Purpose: The G-Man, misunderstood servant of the people." In an interview with series writer Marc Laidlaw and in the official Half-Life audio script, the G-Man is referred to as the "Administrator", suggesting he is the one overseeing experiments.[10][18] This title was later retconned to refer to Wallace Breen.
- The G-Man was to make a cameo in the cancelled Team Fortress 2: Brotherhood of Arms.[19]
- Frank Sheldon, an Alexander Technique practitioner and the person whom G-Man's Half-Life 2 model is based on, was originally slated to be the model for Dr. Breen. It was chosen for G-Man's appearance after Bill Van Buren presented a hastily Photoshopped image of Sheldon, with chopped-off hair and a scaled down face shape.[1]
- Doug Wood, who designed the facial expressions of the Half-Life 2 G-Man model, wanted the player to never quite know what side the G-Man was on by giving him ambiguous facial expressions. For example, Wood would have the G-Man express an apologetic look toward Gordon as he 'regretted' to put the latter in this situation, but then have him give a slight smirk or smile at the end to keep the player guessing about his sincerity.[1]
- The Half-Life 2 model originally had darker eyes and a blue tie instead of purple.[20]
- The Half-Life 2 introductions went through two different versions before the final one. One version, proposed June 2, 2000 to the development team by Marc Laidlaw, has Gordon waking up in the midst of beautiful rolling hills, with a bright blue sky, singing birds, and a modern city below. Then the G-Man appears and the landscape starts to change to become the Combine-controlled City 17, with a wasteland around it, while G-Man does not talk much, preferring to show Gordon images instead of explaining in details. Then, Gordon climbs into a train and it starts moving, and he encounters Samuel. The second one is shorter but the G-Man is more specific, mentioning for example the time lapse between Half-Life and Half-Life 2, which is said to be 10 years, changed to 20 when Episode One was released. Then Gordon was to abruptly wake up on the train, and also encounter Samuel.[1]
- The G-Man is featured in a surreal scene in the WC map pack map
ickypopin which he is held in mid-air by a Crow while a flying Ichthyosaur excretes gibs and crashes beyond the horizon.[13] - In the Episode Two trailer,[21] the G-Man is shown standing over Alyx, apparently talking to Gordon and telling him that he is "not supposed to be here" and that he should "forget about all this." This dialog can be found in its entirety in the Half-Life 2 leak sound files, as "Cleverly done, Mr. Freeman, but you're not supposed to be here. As a matter of fact, you're not. Get back where you belong, and forget all about this, until we meet again.".
- The G-Man character seems to be inspired by The Cigarette Smoking Man (played by William B. Davis) from the television show The X-Files. The show is known as one of the inspirations for Half-Life. In the French localization of Half-Life, the voice for the G-Man is performed by Jacques Brunet, the same actor who performs the French dub for the Cigarette Smoking Man in The X-Files.[22]
- In the cancelled add-on Half-Life: Hostile Takeover, the G-Man was planned to have a group of humans working for him directly and sharing his "MiB" aesthetic. The player character was supposed to be one of these lesser G-men.
- In The Final Hours of Half-Life: Alyx, G-Man's voice actor Michael Shapiro shares hints of the backstory he created for the character over the years, saying that he "wasn't allowed to get into mischief [as a child]", had parents who loved him, and learned how to "avoid getting caught for the trouble he created". While this shouldn't be considered canonical information, it informs how the character is portrayed.
- Almost all the lines for the G-Man dialogue in Half-Life: Alyx were performed in one take.
Trivia[edit]
- In Day One, if the G-Man is attacked enough times, he will clutch his suitcase to his chest and run away, as seen here.
- The G-Man's "prepare for unforeseen consequences" message is a reference to the third chapter of Half-Life, Unforeseen Consequences, in which Gordon Freeman regains consciousness after the Resonance Cascade occurs.
- The official Half-Life 2: Episode One website states that "In Half-Life, the G-Man made you. In Half-Life 2, he used you to defeat Dr. Breen and start the Resistance. In Episode One, he's lost control."
- Half-Life: Alyx is the first instance of a dialogue between a playable character (Alyx Vance) and the G-Man.[23]
- A ghostly apparition of the G-Man can appear as an Easter egg in the official Counter-Strike map Vegas.
- One of the possible names a bot can be called in Team Fortress 2 is "The G-Man".
Gallery[edit]
Models[edit]

Hi-res render of the G-Man's first known model, with a DoD logo on the briefcase.

More recent model, still with a DoD logo on the briefcase.

Early face texture.

Early suit texture.


Half-Life model.

High Definition version.

Alternate High Definition version.[i]

PlayStation 2 version.

Multiplayer model.

Ditto, reskinned with team colors and logos in the unreleased Deathmatch Classic addon ThreeWave CTF.

Ditto, blue team version.

Early Half-Life 2 model.

Half-Life 2 leak model.

Half-Life 2 model, with brighter eyes and purple tie.

Half-Life: Alyx model.


Screenshots[edit]
Half-Life and its expansions[edit]
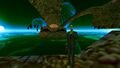
The G-Man talking to Gordon Freeman on Xen, with Boids in the back.
The G-Man addressing Gordon on a battlefield.
The G-Man offering Gordon a choice.

The G-Man briefly stops talking to Adrian Shephard when Black Mesa is destroyed.
The G-Man talking to Adrian Shephard in an Osprey Heliplane.
The G-Man leaving Shephard through a portal.

Unused Steam trading card artwork.


Half-Life 2[edit]
Pre-release[edit]
Ghostly Half-Life 2 leak texture based on the early G-Man model, used in the E3 2003 video "Psyche" and the ending sequences of the WC map pack maps
e3_endandhazard01. It was reused for the Breencasts screen when flickering between Breen and the G-Man.
Ditto.
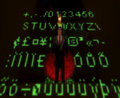
Half-Life 2 leak texture of the same G-Man model among numbers, also used in "Psyche".

Half-Life 2 leak texture based on G-Man's model, also used in "Psyche".

Appearance in the WC map pack map
ickypop.
Ditto.

The G-Man in the E3 2003 demonstration "G-Man".

A secret G-Man image hidden in the game files for the Half-Life 2 ARG.


Retail[edit]

The G-Man on an alternate cover of Half-Life 2.

Full cover art.
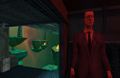
The G-Man addressing Gordon while projecting the test chamber behind him.
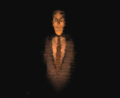
The G-Man disappearing after his monologue.

The G-Man stopping time and emerging out of thin air.
The G-Man addressing Alyx.
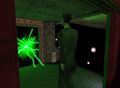
The G-Man teleporting Gordon away from the explosion.

Ditto, with green flashes behind him.
Ditto, in a star field.

The G-Man putting Gordon back into stasis.
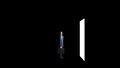
The G-Man leaves.

Steam emoticon of the G-Man.


Half-Life 2: Episode One[edit]

Official wallpaper.

Clean artwork.
The G-Man being halted by Vortigaunts at the start of Episode One.


Half-Life 2: Episode Two[edit]

The G-Man during his Episode Two monologue.

The G-Man during his Episode Two monologue, with Alyx and the Vortigaunts.
Ditto, here in Black Mesa.
Concept art for the Episode Two monologue.
Ditto, here with the White Forest rocket.

Addressing Alyx, Episode Two trailer version.


Half-Life: Alyx[edit]
Pre-release[edit]
The G-Man as he appears Half-Life: Alyx.

Model sheet for facial expressions.

The G-Man as he appears in an unused animation test.

Concept art for an unused ending sequence.


Retail[edit]
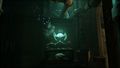
The G-Man awaits in the Vault.

Alyx accidentally sets the G-Man free.

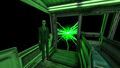
The G-Man changes the environment around him and Alyx.

The G-Man summons a vision of Xen around himself and Alyx.

Ditto, splitting himself into various versions.

The G-Man holds a crowbar as he discusses Gordon's insubordination.
Showing an image of Gordon to Alyx.

The G-Man makes his offer to Alyx.


Other[edit]

Frank Sheldon performing facial expressions.

Ditto.

Ditto.

Ditto.

Ditto.

Sheldon during a 2010 scan for a Source 2 version of the model.

Ditto.

The resulting model.

The G-Man in the closing screen of The Final Hours of Half-Life: Alyx.

Animated Steam sticker featuring the G-Man, titled "G-man" [sic].
Steam 20th Anniversary artwork parodying the "Grant Gustin Next To Oliver Queen's Grave" meme.


List of appearances[edit]
Main games[edit]
- Half-Life
- Half-Life: Opposing Force
- Half-Life: Blue Shift
- Half-Life: Decay
- Half-Life 2
- Half-Life 2: Episode One
- Half-Life 2: Episode Two
- Half-Life: Alyx
Other[edit]
- Half-Life: Day One (First appearance)
- Half-Life: Uplink (Non-canonical appearance)
- Deathmatch Classic (Non-canonical appearance)
- ThreeWave CTF (Non-canonical appearance)
- Half-Life 2: Raising the Bar
- Source Particle Benchmark (Game files only) (Non-canonical appearance)
- The Final Hours of Portal 2
References[edit]
- ↑ 1.0 1.1 1.2 1.3 1.4 1.5 1.6 1.7 1.8 1.9 Half-Life 2: Raising the Bar
- ↑ 2.0 2.1 2.2 Interview with Marc Laidlaw on Computer and Video Games (December 23, 2006) (archived)
- ↑ Half-Life Multiplayer Content on Blue's News (January 28, 1999)
- ↑
 Jamaal Bradley on Twitter
- ↑ GMAN: Reference Shoot for Half Life Alyx Ending on Vimeo
- ↑ Half-Life 2: Episode One: The story so far on Episode One's official website (archived)
- ↑ 7.0 7.1 Interview with Marc Laidlaw on PC Gamer Online (archived)
- ↑ 8.0 8.1 Half-Life 2 Xbox Prima Guide
- ↑ The Marc Laidlaw Vault on Steam Users' Forums (archived)
- ↑ 10.0 10.1 Half-Life Audio Script
- ↑ Half-Life: Opposing Force
- ↑ The Half-Life chapter Lambda Core, and the Opposing Force chapter Foxtrot Uniform
- ↑ 13.0 13.1 13.2 WC map pack
- ↑ Tweet: "Haha cool you noticed this! Some Easter eggs are too hard to find, no one ever found the gman face I put in Eli’s lab." @dhabiheng (Dhabih Eng) on Twitter (July 5, 2019)
- ↑ Half-Life 2: Episode Two commentary
- ↑ ValveTestApp854 Achievements on eXophase.com (ValveTestApp854 is the internal Steam app for Episode Two)
- ↑ Leaked Postal III build,
hl2_english.txt - ↑ Interview with Marc Laidlaw on PC Gamer Online (archived)
- ↑ Team Fortress II: Brotherhood of Arms promotional article
- ↑ Half-Life 2 leak
- ↑
 Half-Life 2: Episode Two trailer on YouTube
- ↑ Half-Life 2: Raising The Bar, Yahn Bernier: "The original concept for Half-Life came from folks here thinking about Stephen King's short story The Mist, along with a healthy dose of X-Files style conspiracy thrown in."
- ↑ Half-Life 2: Episode One's official website (archived)