Sector G
| This article would greatly benefit from the addition of one or more new images. | ||
|---|---|---|
Please upload one or several relevant images (from canonical / official sources) and place it here. Once finished, this notice may be removed. |

| |
| Sector G | |
|---|---|
| General information | |
| Destroyed |
200-, during the Black Mesa Incident |
| Location | |
| Usage | |
| Era(s) | |
| Faction | |
| Map(s) |
|
- "If you're waiting for the tram to Sector G, then you're probably better off walking it. I overheard someone say that all the trams on this end of the facility are having problems."
- ― Black Mesa scientist[src]
Sector G, referred to as Sector G Hydro Electric,[1] is one of the seven main Sectors[1] of the Black Mesa Research Facility. It is connected to the Red Line of the Black Mesa Transit System.[1] Sector G has at least eight main indoor Levels accessible through the dual Main Access Lifts.[2]
Contents
Known locations[edit]
Freight hangars[edit]
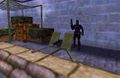
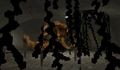
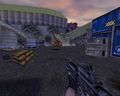
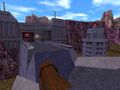
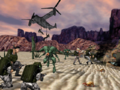
After defeating the Pit Worm, Adrian Shephard goes through a series of partially destroyed hangars located on the other side of the Hydro-Electric Dam. There he and several of his comrades, battle many Black Ops soldiers and Race X creatures squabbling over the area. When he goes through the main hangar area for the first time, it is filled with explosives. The access to the dam is blocked, and he is forced to go underground. There he fights an endless swarm of Pit Drones he must contain by closing two large blast doors with levers and faces a colony of nesting Voltigores in pitch black corridors. When he reaches the surface again, the main hangar area is in ruins, as the explosives have detonated and cleared a path to the dam.[3]
Gallery[edit]
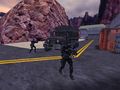
A Black Ops truck with unloaded troops at the start of the area.
Black Op manning a Tripod-Mounted Heavy Machine Gun.
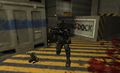
Male Black Op firing at Shock Troopers in one of the hangars.
The main hangar area.


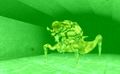
Voltigore hiding behind the vegetation.
The Pit Drone chamber.
Voltigore preparing for an attack in the pitch black corridors.
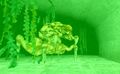
Voltigore shooting at Shephard.

Baby Voltigore and egg in a nest.

Baby Voltigores and egg in a nest.

Nesting Voltigore.
Idle Voltigore in the pitch black corridors.
Ditto.

Human skeleton and Submachine Gun in the Voltigore corridors.
Human skeletons and spore cluster in a nest in the Voltigore corridors.
The main hangar area after the explosives' detonation.
Two Shock Troopers and a Voltigore in the hangar area behind the dam.


Topside Hydro Plant[edit]

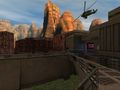
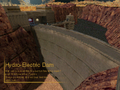
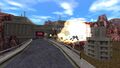
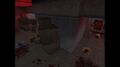
Sector G's most prominent feature is the Topside Hydro Plant, featuring the iconic Hoover Dam-like Hydro-Electric Dam. A road passes above the dam; one direction leads to the Advanced Biological Research Lab,[4] the other to the freight hangars mentioned above.[3]
When Gordon Freeman reaches the dam from the Advanced Biological Research Lab, it is mostly intact, but the HECU posted a cannon on the other side. An Apache is also patrolling the area and destroys the bridge linking the intake tower to the dam. Freeman is forced to quickly dive into the basin where an Ichthyosaur is swimming to reach the intake tower and stop one of the propellers below, then pass under the dam to proceed further, in a desert area.[4]
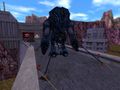
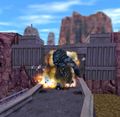
Later, Adrian Shephard reaches the dam after going through the hangar area on the other side. There he witnesses his comrades assaulting a trapped Gargantua, while the G-Man is talking on a cell phone in the intake tower, before leaving through a portal where Sprites are diving in. He then defeats the creature with dynamite, damaging the middle of the dam. At that point, the other side of the dam from which Freeman originally came is blocked by Race X moss, and the water level on the other side of the dam has also greatly risen, apparently due to Freeman having turned off the turbines underwater.[3]
A duct system inside the dam leads to exit H-287GQ, located in a small desert area. Farther Sector E Materials Transport can be reached through an Ordinance Storage Facility, under which the Gene Worm appears.[3]
The name "Topside Hydro Plant" is given in a Black Mesa Announcement System announcement;[4] the name "Hydro Electric" is given in a Black Mesa Transit System map seen in Blue Shift.
Gallery[edit]
|
Early screenshot.
The dam in a Black Mesa advertisement.

The fuel storage full of fuel barrels.
The Artillery Cannon on the dam.

The G-Man on the phone.
HECU destroying the bridge to the tower.

The canyon.


Before.
After.

Staged screenshot of Shephard and his comrades fighting Shock Troopers, Headcrabs and Black Ops in the area following the dam.


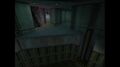
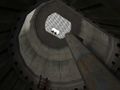
Sector G Main Access Lift[edit]
The Main Access Lift is a set of two elevators linking Sector G Level 1 to at least Level 4, Level 1 being connected to the Black Mesa Transit System. The one used by Barney Calhoun and two scientists when the Resonance Cascade occurs is seen to connect to Levels 1, 2 and 4 only, the latter consisting of several sublevels accessed from both sides of the elevator shaft. As the name implies, both elevators presumably give access to the entirety of Sector G.[5]
Gallery[edit]
At least one image in this gallery is not captioned. You can help by describing the files below. |


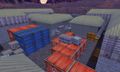
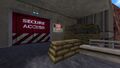
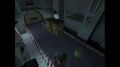
Small Materials Storage Area[edit]
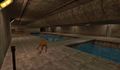
Visited by Calhoun after the elevator failure, this area is connected to the Main Access Lift and located in a sublevel of Level 4. It is filled with crates and boxes, as well as Houndeyes. Beyond it is a large flooded office, then two handling areas.[5]
Gallery[edit]
The area with crates and boxes.
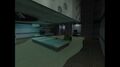
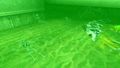
The large flooded office.


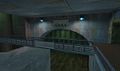
Handling areas[edit]
The first of two large handling areas connects Tunnels South and North, each closed by large doors. Access to North Tunnel is denied to Calhoun due to a button failure, he can only access South Tunnel. Beyond the tunnel is another handling area with a set of cranes that Calhoun uses to proceed to the Drainage Canal.[5]
Gallery[edit]

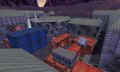
The first handling area.
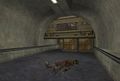
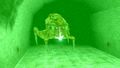
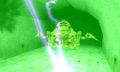
Dead Vortigaunt in the South Tunnel.
The second handling area.


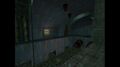
Drainage Canal[edit]
The canal, presumably still part of Level 4 (no Level signs are seen beyond the Small Materials Storage Area) and used for Waste Crushing and Disposal, is accessed by Barney Calhoun through Entry Point B-03. It features a large elevator used to move important items such as crates, and two large wheels in the canal itself used to crush garbage. The Drainage Canal is also connected through a small trapdoor to a small road linking the Freight Yard to the South Exit.[5]
Gallery[edit]
The Waste Crushing and Disposal in the Drainage Canal.
The elevator.

The two large wheels.
An area infested with barnacles.

Two zombies dragging a security guard.
Calhoun catches HECU soldiers throwing away security guard corpses.


List of appearances[edit]
- Half-Life (First appearance)
- Half-Life: Opposing Force
- Half-Life: Blue Shift
References[edit]
- ↑ 1.0 1.1 1.2 Black Mesa Transit System map
- ↑ As heard by the Black Mesa Announcement System in Blue Shift: "Warning. Main power failure in Levels 3, 5 and 8."
- ↑ 3.0 3.1 3.2 3.3 Half-Life: Opposing Force
- ↑ 4.0 4.1 4.2 Half-Life
- ↑ 5.0 5.1 5.2 5.3 Half-Life: Blue Shift
| Preceded by Advanced Biological Research Lab |
Half-Life story arc journey | Succeeded by Black Mesa desert |
| Preceded by Waste Processing Area 3 |
Half-Life: Opposing Force story arc journey | Succeeded by Sector E Materials Transport |
| Preceded by H-E Particle Labs |
Half-Life: Blue Shift story arc journey | Succeeded by Freight Yard |