GLaDOS' testing track (Portal)
| The title of this article is unofficial. | ||
|---|---|---|
As no official title was formally given for this subject matter, the name used here was created for the wiki. |
This article is about GLaDOS' testing track in Portal. For GLaDOS' testing track in Portal 2, see GLaDOS' testing track (Portal 2). |
This article is a stub. Maybe you can help by expanding it. |
|---|
| Warning! This article has yet to be cleaned up to a higher standard of quality, per our Cleanup Project. It may contain factual errors and nonsense, as well as spelling, grammar and structure issues, or simply structure problems. Reader's discretion is advised until fixing is done. | ||
|---|---|---|
You can help clean up this page by correcting spelling and grammar, removing factual errors and rewriting sections to ensure they are clear and concise, and moving some elements when appropriate. |
| This article would greatly benefit from the addition of one or more new images. | ||
|---|---|---|
Please upload one or several relevant images (from canonical / official sources) and place it here. Once finished, this notice may be removed. |

| |
| GLaDOS' testing track (Portal) | |
|---|---|
| General information | |
| Location | |
| Builder |
|
| Usage | |
| Era(s) | |
| Faction |
Aperture Science |
| Map(s) |
|
GLaDOS' testing track (Portal) is the testing course featured in Portal, and partially revisited during the course of Portal 2's intro in the single-player campaign. Consisting of 19 test chambers, it was first used by Chell as part of her mandatory testing.
The first chamber of this course is located nearby the Extended Relaxation Center from which Test Subjects are deployed from and put into temporary stasis in the Relaxation Vault. The last chamber of this course however, is connected to the Incinerator Room.
Contents
- 1 Test Chambers
- 1.1 Test Chamber 00
- 1.2 Test Chamber 01
- 1.3 Test Chamber 02
- 1.4 Test Chamber 03
- 1.5 Test Chamber 04
- 1.6 Test Chamber 05
- 1.7 Test Chamber 06
- 1.8 Test Chamber 07
- 1.9 Test Chamber 08
- 1.10 Test Chamber 09
- 1.11 Test Chamber 10
- 1.12 Test Chamber 11
- 1.13 Test Chamber 12
- 1.14 Test Chamber 13
- 1.15 Test Chamber 14
- 1.16 Test Chamber 15
- 1.17 Test Chamber 16
- 1.18 Test Chamber 17
- 1.19 Test Chamber 18
- 1.20 Test Chamber 19
- 2 List of appearances
- 3 References
Test Chambers[edit]
Test Chamber 00[edit]


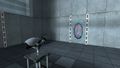
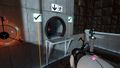
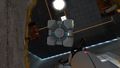
Being the first test chamber of this Testing Track, Test Chamber 00 contains both the actual test and the Relaxation Vault. Once the test subject exits the relaxation chamber, they will enter the test room, which contains an Aperture Science Heavy Duty Super-Colliding Super Button and Storage Cube dispenser. This test is meant to teach the test subjects the relationship between Super Buttons and Weighted Storage cubes. It is also the only test chamber to not involve portals.
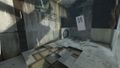
Test Chamber 00 later reappears in Portal 2, still acting as the introductory Test Chamber for the game. The chamber itself is now heavily damaged and overgrown, and the bed in the relaxation chamber is no longer present. The door to the exit is also malfunctioning, and repeatedly opens and closes itself upon being unlocked.
Gallery[edit]
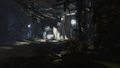
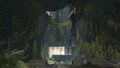
Early version of decayed Test Chamber 00 from Portal 2.
Ditto.


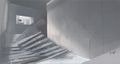
Test Chamber 01[edit]


The next test chamber is another test meant to teach test subjects how Super Buttons and Storage Cubes work, but this time the test is much more advanced. Instead of the Storage cube and Button being right next to each other like in Test Chamber 00, the two are separated by glass walls. This time, the test subject has to wait for automated portals to shoot into the 3 walled off areas, eventually getting the Storage Cube onto the button and moving on to the next Test Chamber.
When Chell returns to this testing track in a ruined state in Portal 2, there seems to have been some changes made while she was in stasis. Instead of the portals being made automatically, the test subject now decides when and where the portals are created through use of buttons. This was to prevent the sudden slowdown in gameplay while also creating a more instructive environment, avoiding a "Portal Carousel" effect, as stated by Alex Vlachos.[1]
Gallery[edit]
Early screenshot of decayed Test Chamber 01 in Portal 2.
Ditto.
Ditto.
Ditto.
Ditto.


Test Chamber 02[edit]

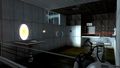
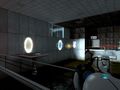
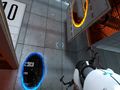
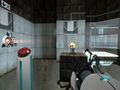
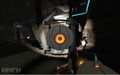
Test Chamber 02 is the first "real" test, in that it is the first test in this testing track that the test subject solves by using the Aperture Science Handheld Portal Device. However, the ASHPD the test subject receives is incomplete, as it is only able to shoot blue portals. The test involves the test subject first navigating through automated portals to obtain the ASHPD. Once it is obtained, the test subject must use it to get out of the pit that contained it.
In Portal 2, Chell encounters Wheatley here. One of the walls within the chamber has collapsed, allowing her to walk to the pedestal that formerly held the portal device, which Wheatley claimed had fallen off. Upon approaching the pedestal, the floor collapses and drops Chell into a heavily decayed and partially flooded test chamber, where the portal device can be found, surrounded by murals drawn by Doug Rattmann.
Gallery[edit]
Early Test Chamber 02.
Ditto.
Ditto.
The decayed Test Chamber 02 in Portal 2.


Test Chamber 03[edit]

This Test Chamber involves the Test Subject creating portals to get across two large gaps. This was meant to assure the player does not become adverted to using either color portal freely simply due to an early preference. It is also meant to introduce test subjects to the concept of hopping through portals, and how they connect.
In Portal 2, this chamber is accessed from an observation room near the entrance instead of the elevator. The room itself has also been redesigned somewhat, being smaller and more linear. The puzzle itself remains unchanged, however.
Gallery[edit]
Early Test Chamber 03.
Ruined version of Test Chamber 03, being a concept art for Portal 2.
Another view of the damaged chamber.
Early screenshot of decayed Test Chamber 03 in Portal 2.
The decayed Test Chamber 03 in Portal 2.


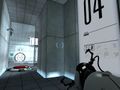
Test Chamber 04[edit]

Test Chamber 04 is another Cube and Button test. Curiously, this test chamber is almost exactly the same as Test Chamber 00, the only difference between the two being the fact that this test chamber involves the use of portals to get the Weighted Storage Cube onto the button. There is also a pane of glass in front of the button, preventing players from standing on it and placing a portal through the exit door.
In Portal 2 this test chamber was merged with Test Chamber 05, with the exit of one directly connecting to the entrance of the other. The chamber itself is virtually unchanged, except for the pane of glass blocking the button having been shattered.
Gallery[edit]
Early Test Chamber 04.
The decayed Test Chamber 04 in Portal 2.
Ditto.


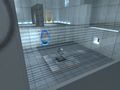
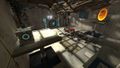
Test Chamber 05[edit]

Yet another Cube and Button test, this time the test subject must retrieve two Weighted Storage Cubes, one on a high platform and one in a pit, and put them on two separate buttons.
In Portal 2, the original Test Chamber 05 has been merged with Test Chamber 04. The chamber itself is mostly unchanged, however the glass panel Chell lands before exiting the elevator collapses under her weight, and the ceiling of the hall to the elevator has collapsed, forcing Chell to pass through a maintenance area, where a new Ratman den can be accessed.
As the original chamber was merged with chamber 04, a new test chamber has taken it's place in Portal 2. This chamber is also a Cube and Button test, and also introduces the player to hazardous goo. The player must first use a portal to get a Cube, which is put on a button to create stairs to an elevated platform. From here, the player must use a switch to get another cube, while also using a separate switch to deploy a panel, which prevents to second cube from being flung into the goo. This cube must then be put on a second button to open the door to the exit.
Gallery[edit]
Test Chamber 05 in Portal 2.
Recreated by Valve in a pre-release version of the Puzzle Maker.
Ditto.


Test Chamber 06[edit]

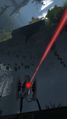
This test is the first in this Testing Track to involve Aperture Science High Energy Pellets. The test subject must get the High Energy Pellet into a receptacle in order to solve this test. When Chell re-visits this testing track in Portal 2, the Aperture Science High Energy Pellet has been replaced by a more efficient Thermal Discouragement Beam.
In Portal 2, the original Test Chamber 06 is now found later in the game, acting as Test Chamber 01 of the new Testing Track, with a completely new Test Chamber taking its place. The new Test Chamber is comparable to Portal's Test Chamber 10, consisting of two seperate rooms, both requiring cubes and flinging to complete.
Gallery[edit]
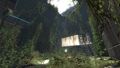
Early Test Chamber 6.

Test Chamber 06 in Portal 2.
Ditto.


Test Chamber 07[edit]

Like Test Chamber 06, this test chamber also involves the Aperture Science High Energy Pellet. It is solved exactly like the previous test, but this time the test subject has to find a way to get onto a lift which will take them to the chamberlock.
In Portal 2, Chell is again reunited with Wheatley here. All the testing elements in the chamber itself are damaged and a wall has collapsed, creating an opening into another room. Wheatley instructs Chell to place a portal in the room behind him so that there is room for her to catch him when he disengages from his management rail.
Gallery[edit]
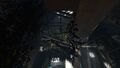
A destroyed High Energy Pellet launcher in a ruined version of Test Chamber 07, being a concept art for Portal 2.
The decayed Test Chamber 07 in Portal 2.


Test Chamber 08[edit]

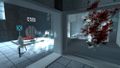
Test Chamber 08 is another High Energy Pellet test. This test is solved the same as the previous two, with an added twist of bouncing the High Energy Pellet off of the wall. This test chamber is the first to have the consequence of death upon failure, as the floor is filled with acid. However, it is later stated by GlaDOS that "any appearance of danger is merely a device to enhance your experience."
In Portal 2, a new chamber labeled as Test Chamber 08 is briefly visited by Chell, after Wheatley instructs her to portal into the room from Chamber 07. it is from this chamber that Wheatley opens a "secret panel" into the maintenance areas, which eventually leads to GLaDOS' ruined chamber. This version of test chamber 08 has barely anything in it other than a crooked chamber sign and a broken part of an indicator light that flickers between orange and blue.
Gallery[edit]
Early Test Chamber 08.
Ditto.
Test Chamber 08 in Portal 2.


Test Chamber 09[edit]

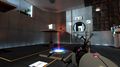
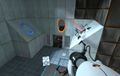
Test Chamber 09 is a Cube and Button test, but is also used to observe a test subject's performance in an environment of "extreme pessimism." Upon entering the chamber, the test subject will be falsely informed that the test is impossible. Other pessimistic comments are also given to the test subject throughout the test. To solve it, the subject must first get the Storage Cube onto the high platform, pass through the Material Emancipation Grill, and fire a portal on the wall to get the cube from the other side onto the button.
This Test Chamber is revisited in Portal during The Escape, however It lacks the Cube, but due to the player now having the Dual Portal device, it is easily solved.
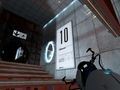
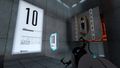
Test Chamber 10[edit]

This test is meant to introduce the test subject the the concept of using portals to manipulate forward momentum. This test is separated into multiple sections. The first section is a small room in which the test subject must use momentum to get onto the staircase. The second part is solved the exact same way. The third, and final, section has the subject creating portals on a high surface and jumping into a pit with another portal to get onto a platform. this is done multiple times, with the wall getting closer each time, allowing the test subject to get flung farther.
Gallery[edit]
Early Test Chamber 10.
Ditto.
Ditto.


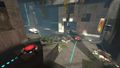
Test Chamber 11[edit]

Test Chamber 11 is the final test to use automatically created portals, as this is the test where the test subject receives the fully-operational ASHPD. Upon entering, the subject will be in a small room which they have to portal out of, allowing them to complete the test. After this, the test subject will be able to access the fully operational ASHPD and exit the test chamber.
Gallery[edit]
Early version.

Test Chamber 12[edit]
This section is empty or incomplete. Maybe you can help by expanding it. |

More flinging, now with more freedom allowed by the upgraded device.
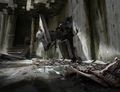
In the E3 2010 teaser trailer for Portal 2, a ruined version of this chamber was seen before being cut.[2]
Gallery[edit]
Ruined version of Test Chamber 12, being a concept art for Portal 2.
Ditto.
Early screenshot of decayed Test Chamber 12 in Portal 2.
Ditto.
Ditto.
Ditto.

Ditto.
Ruined version of Test Chamber 12, as seen in the E3 2010 teaser trailer for Portal 2.
Ditto.
Possible appearance of Test Chamber 12, this time with Turret.


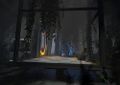
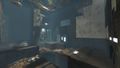
Test Chamber 13[edit]
This section is empty or incomplete. Maybe you can help by expanding it. |

The first real challenge. Combines buttons, cubes, energy balls and unstationary scaffolds.
Early concept art suggests this chamber was originally suppose to appear as an introductory Test Chamber in Portal 2, however it does not appear in the final game.
Gallery[edit]

Early Test Chamber 13.
Ditto.
Ditto.
Ditto.
Ditto.
Ditto.
Ditto.
Ditto.
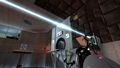
Ditto.

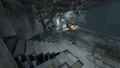
Ruined version of Test Chamber 13, being a concept art for Portal 2.
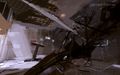
Ditto.
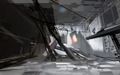
Ditto.
A ruined version of Test Chamber 13, as seen in early Portal 2 screenshot.


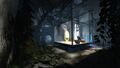
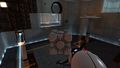
Test Chamber 14[edit]
This section is empty or incomplete. Maybe you can help by expanding it. |

Another challenge. Combines buttons, boxes, energy balls, moving platforms (moving vertically in this case) and acid pits.
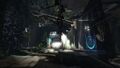
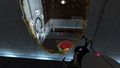
Test Chamber 15[edit]
This section is empty or incomplete. Maybe you can help by expanding it. |

A quick but also very difficult test. It involves the use of the Emancipation Grills that are used outside of just leaving test chambers and being used in tests. Often frustrates players because they are unaware of the grid's ability to close portals.
Test Chamber 16[edit]
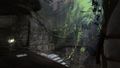
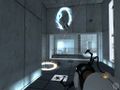
This test chamber is the first to introduce Aperture Science Sentry Turrets, said by GLaDOS to be a replacement for a normal Test Chamber.
The player finds the first Ratman den, hinting at the reality of the tests, as well as the fact that there are other people still trapped in the building.
Gallery[edit]
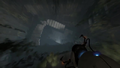
Early version.
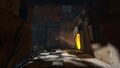
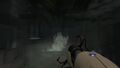
Turrets firing at Chell in Test Chamber 16.
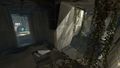
Ratman's den near Test Chamber 16.
Remains of Rattmann's presence near Test Chamber 16.


Test Chamber 17[edit]

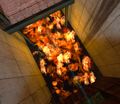
Notable because of the appearance of another character: the companion cube. The player is intended to carry their new companion through the entire chamber, using it to solve the majority of the chamber's puzzles. At the end of the chamber, Chell is forced to "euthanize," or more bluntly, incinerate the Companion Cube.
Gallery[edit]
Test Chamber 17.
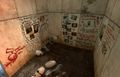
Ratman's den near Test Chamber 17.
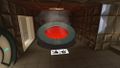
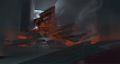
The furnace waiting for the Companion Cube.


Test Chamber 18[edit]
This section is empty or incomplete. Maybe you can help by expanding it. |
This is often considered the hardest chamber. Turrets reappear here. At the end, GLaDOS says that "the next test requires exposure to uninsulated electrical parts, that may be dangerous under certain conditions," which comes into importance later.
Gallery[edit]
Early Test Chamber 18.
Test Chamber 18.


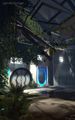
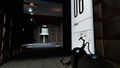
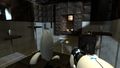
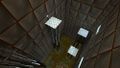
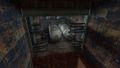
Test Chamber 19[edit]

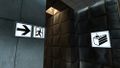
This is the final test in the testing track. The test is made of an Aperture Science High Energy Pellet puzzle, and then an Unstationary Scaffold ride over a large pit of goo. This ride is full of fast paced puzzles such as button pressing, energy pellet dodging, and portals to bypass walls. The end is then met with the Incinerator Room which was meant to be where they were supposed to receive their promised cake.
In Portal 2, Chell revisits this chamber after GLaDOS drops her into the incinerator room. The dual Portal Device is found in what was formerly the chamber's fire pit, which connects directly to the incinerator room. Chell uses the Portal Device to get out of the pit and into the, now empty, river of goo. She eventually makes it back to the chamber's entrance and takes the elevator to Test Chamber 01 of GLaDOS' new testing track.
Gallery[edit]
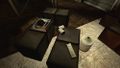
The cake and the exit appear to be close.
It's a trap!
Hop.
Test Chamber 19 in Portal 2.


List of appearances[edit]
Main games[edit]
Other[edit]
References[edit]
| Preceded by N/A |
Portal journey | Succeeded by Incinerator Room |
| Preceded by Aperture Science Extended Relaxation Center |
Portal 2 journey | Succeeded by Central AI Chamber (1) |
| Preceded by Incinerator Room |
Portal 2 journey (2) | Succeeded by GLaDOS' testing track (Portal 2) |