Wheatley's testing track
| The title of this article is unofficial. | ||
|---|---|---|
As no official title was formally given for this subject matter, the name used here was created for the wiki. |
This article is a stub. Maybe you can help by expanding it. |
|---|
| Warning! This article has yet to be cleaned up to a higher standard of quality, per our Cleanup Project. It may contain factual errors and nonsense, as well as spelling, grammar and structure issues, or simply structure problems. Reader's discretion is advised until fixing is done. | ||
|---|---|---|
You can help clean up this page by correcting spelling and grammar, removing factual errors and rewriting sections to ensure they are clear and concise, and moving some elements when appropriate. |
| This article would greatly benefit from the addition of one or more new images. | ||
|---|---|---|
Please upload one or several relevant images (from canonical / official sources) and place it here. Once finished, this notice may be removed. |
| Wheatley's testing track | |
|---|---|
| General information | |
| Location | |
| Builder |
|
| Usage | |
| Era(s) | |
| Faction |
Aperture Science |
| Game information | |
| Map(s) |
|
| Designer(s) |
Cayle George (level design)[1] |
Wheatley's testing track is the testing track created by Wheatley during Chell's journey through Test Shaft 09. It is made of 19 Test Chambers.
Contents
- 1 Test Chambers
- 1.1 Frankenturret "Dedicated" Chamber
- 1.2 "Self-made" Chamber
- 1.3 Test Chamber 01
- 1.4 Test Chamber 02
- 1.5 Test Chamber 03
- 1.6 Test Chamber 04
- 1.7 Test Chamber 05
- 1.8 Test Chamber 06
- 1.9 Test Chambers 07 to 10
- 1.10 Test Chamber 11
- 1.11 Test Chamber 12
- 1.12 Test Chambers 13 and 14
- 1.13 Test Chamber 15
- 1.14 Test Chamber 16
- 1.15 Test Chamber 17
- 1.16 Test Chambers 18 and 19
- 1.17 Test Chamber 75
- 2 Behind the scenes
- 3 List of appearances
- 4 References
Test Chambers[edit]
Frankenturret "Dedicated" Chamber[edit]

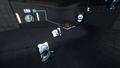
The very first "test" designed by Wheatley. It features several Frankenturrets and a button they were intended to walk on. They can not actually accomplish this, deactivating if the player orients them in a fashion by which they might actually do it.
After Chell completes this chamber, Wheatley welcomes her and PotatOS, and sends her to test chambers made for humans.
Gallery[edit]
Early version of Frankenturret "Dedicated" Chamber.

"Self-made" Chamber[edit]

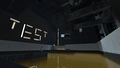
Numbered "01/01," this is a test made entirely by Wheatley, and the first one intended for humans. It is very simple: a switch must be used to drop a Frankenturret on a button. Between them is a "deadly moat" that is neither deadly nor a moat, as Wheatley admits he could not figure out how to fill it with the toxic goo. One notable feature is the word 'TEST' made out of lights on one of the walls. In the developer commentaries, Valve mentions this as a parody of beginning mappers.
Instead of making a second test, Wheatley decides to make Chell go through this chamber twice. However, being not satisfied with this, he then guides Chell through chambers made by GLaDOS.
Gallery[edit]
Early version of "Self-made" Chamber.

Test Chamber 01[edit]

The first chamber to introduce Excursion Funnels, the player needs to use the Funnel to reach a Frankenturret and direct it onto a button located on the ceiling. Originally made by GLaDOS, Wheatley defends the idea he made it by adding the word 'TEST' to the wall with white panels, saying "Not entirely, not entirely. Look at the word 'test', on the wall there. That's brand new."
Test Chamber 02[edit]
A chamber similar to one seen in an Excursion Funnel trailer. Wheatley claims to have made it himself from many other smaller tests. Considering the test seen in the trailer, this may or may not be true. He attempts to give Chell the solution to the test because it's taking too long, but is unable to.
Test Chamber 03[edit]
Upon walking in, Wheatley says he found hundreds of test chambers in a sealed off wing. This is the first test chamber Wheatley does not obtain his solution euphoria.
Test Chamber 04[edit]
Wheatley at this point decides to mock Chell like GLaDOS did instead of motivating her, but isn't very successful at that. The chamber once again features several bottomless pits and Excursion Funnel puzzles.
Test Chamber 05[edit]
Wheatley plays classical music during this level to convince GLaDOS and Chell that he is not a moron. He also pretends to have just finished reading books, including one by Machiavelli.
Test Chamber 06[edit]
Wheatley moves this test chamber closer to his lair to try increase the solution euphoria. This is notably the only test chamber without an Excursion Funnel.
Test Chambers 07 to 10[edit]
Since Wheatley moves Chell closer to his lair, these Test Chambers are unreachable.
Test Chamber 11[edit]
Desperate to get the solution euphoria, Wheatley decides to tape ten tests and watch them all at once. However, Chell refuses to comply with either of his requests, namely to solve the test ten times as quickly and to warn him before she solves it so as not to "spoil the ending".
Test Chamber 12[edit]
The chamber is rocked by huge tremors as the reactor core continues to destabilise. Wheatley vainly attempts to convince GLaDOS and Chell that these are programmed into the test chamber "for old times' sake". After the test is solved, there is still no euphoria for Wheatley, and he seems to be coming to terms with it. The elevator to chamber 13 is "out of service - because it melted", so Wheatley rigs an Excursion Funnel to transport Chell there instead. However, a rail breaks, sending a test chamber hurtling towards Chell. It is halted by some more rails just before it hits her, but Wheatley, true to his programming, turns off the Excursion Funnel and lets Chell and GLaDOS to fall into the abyss. Luckily a catwalk breaks their fall.
Test Chambers 13 and 14[edit]
Due to the Excursion Funnel being shut off, these chambers are unreachable.
Test Chamber 15[edit]
Upon walking into the test chamber, Wheatley is surprised to find that Chell survived the fall from the tractor beam. Upon solving the level, Wheatley states obvious hints that he is planning on killing Chell.
The player can see P-body running away as he opens a wall to create a solution to the puzzle.
Test Chamber 16[edit]
This was the last actual test within Wheatley's test tracks. The chamber primarily utilizes Repulsion Gels, which are used to rid the Turrets that were an obstacle to the exit.
If one of the turrets are saved from the gel, it can be used to fire at Wheatley's broadcast monitor screens.
Test Chamber 17[edit]
This test serves the purpose of tricking both Chell and GLaDOS into a trap without them expecting it to be happening this soon. The two are catapulted into an Excursion Funnel that eventually leads to a panel, which then will catapult directly into a huge chamber filled with crushers.
This test is the first level of Chapter 9: The Part Where He Kills You. Also the model for the early Faith Plate , simply a panel, was used to push Chell and GLaDOS towards Wheatley's trap. In the Co-op campaign, there is a model with a Faith Plate hung in place by a Multitasking Arm, this was probably because the 'Faith Plate on an arm' wasn't created until later on in the game.
Test Chambers 18 and 19[edit]
It is unknown what these two tests are, or even if they exist, as Wheatley had already planned the trap early by faking the test in Test Chamber 17.
Test Chamber 75[edit]
One of the many test chambers Wheatley had constructed in an attempt to capture Chell and GLaDOS after she had escaped his death trap. When Wheatley figured out where the two are headed, he simply moves this test chamber towards their path, destroying the bridge, leaving the only place to go is to go inside the very chamber.
Upon entering, Chell is greeted by seven Defective Turrets and a boxed one. This was not intended as he had thought the turrets he deployed were the functional ones. When he realizes that Chell was not hit by a single bullet, he begins deploying the regular turrets outside the Test Chamber.
On the panel with the test chamber number, the normal test icons are all replaced by the same picture of a turret shooting a stick person.
Behind the scenes[edit]
According to Valve level designer Cayle George, the creators of this testing track came up with the idea of smashing Wheatley's monitor screens after observing a playtester's attempt to break them in Test Chamber 05 during development.[1] Zachary Franks remarked that, while placing the monitor in Test Chamber 06, one of the designers thought it would be funny if the monitor was the target of the Faith Plate and would get broken if the player or the cube flew into it. They thought the gag worked well and decided to make every monitor in the game breakable.[2]
List of appearances[edit]
References[edit]
- ↑ 1.0 1.1 Cayle George on his video game work (August 30, 2017)
- ↑ Portal 2 commentary
| Preceded by Test Shaft 09 |
Portal 2 journey | Succeeded by Central AI Chamber (3) |