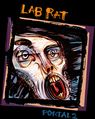
Portal 2: Lab Rat

| |

| |
| Portal 2: Lab Rat | |
|---|---|
| Author(s) |
|
| Language | |
| Publication date | |
| Pages |
26 |
| Previous comic |
N/A |
| Next comic | |
- "You can always ignore your conscience."
- ― Doug Rattmann
Portal 2: Lab Rat is a comic made to bridge the gap between Portal and Portal 2, and the first official comic set in the Half-Life and Portal universe. Expanding the history of Aperture Science, its main protagonist is Doug Rattmann, also known as "the Ratman". This is his first formal appearance after indirectly appearing in Portal and the Portal ARG.
Contents
Overview[edit]
The first part of the comic was published April 8, 2011;[2] the second part was released April 11, 2011.[2]
Lab Rat is a full in-house production that was entirely supervised by Valve. It was drawn by Andrea Wicklund (the main story) and the project leader, Michael Avon Oeming (the layouts and the flashbacks), while Portal 2 writers Erik Wolpaw, Chet Faliszek, Jay Pinkerton, as well as Ted Kosmatka (who did most of the writing), made the story.[1]
Characters[edit]
- Doug Rattmann
- The Weighted Companion Cube
- Chell
- GLaDOS
- Two unidentified Aperture employees
- Henry
- Cave Johnson (Prerecorded message only)
- The Party Escort Bot
- Sentry Turrets
- Dead Aperture employees
- Charles Cardoze (name only)
- Phil Konig (name only)
- Christopher M. Pham (name only)
- Arsenio Navarro (name only)
- William D. Kent (name only)
- Al Anderson (name only)
- Emily Naransky (name only)
- David C. Self (name only)
- Doug Hopper (name only)
- Marc Meaux (name only)
- Brenda Bogenschutz (name only)
- James Murray (name only)
- S.J. Nye (name only)
- Lazarus Grey (name only)
- Leve Rage (name only)
- Robert C. Knoll (name only)
Plot[edit]
Part 1[edit]

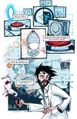
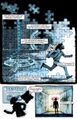
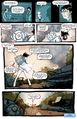
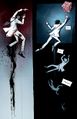
Part 1 follows Doug Rattmann as he is tracking Chell through the Enrichment Center. He is having a monologue about reality and how the mind sees it, and is shown to be psychotic, forced to take ziaprazidone [sic] to curb the effects of his schizophrenia. Through the story, he carries a Companion Cube that he hears talking to him and giving him advice. The main story is also intersected with flashbacks of the period during which GLaDOS was still being built, showing Rattmann's involvement in the project.
Soon after discovering Chell, it appears he has not taken his medication for a while, and he takes his two final pills, against the Companion Cube's advice not to take them. A first flashback is shown, with a younger Rattmann overhearing two colleagues saying they put cameras in the cameras, something that an unidentified person is not to suspect. While he runs through the facility and makes another mural, Chell reaches Test Chamber 19, and finally GLaDOS' chamber, where she destroys her.

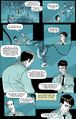
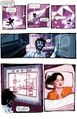
Then another flashback set in GLaDOS' chamber is shown. There Rattmann is seen working with his colleague Henry, who compares their breakthrough with GLaDOS to Einstein discovering relativity and the NASA reaching the Moon. Rattmann expresses his doubts about GLaDOS' reliability, since she always attempts to kill everyone when being powered.
Back to reality, Rattmann reaches for the surface, where he thinks Chell is. When he finds her, the Party Escort Bot is dragging her back into the facility.
Then a third flashback has Henry showing Rattmann the newly designed Morality Core, which is supposed to tame GLaDOS' urge to kill.
Again back to reality, the Cube tells Rattmann to run away while he is outside, but feeling he is responsible for the whole mess, he prefers to get back inside, and save her.
Part 2[edit]

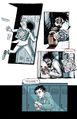
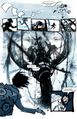
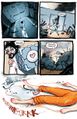
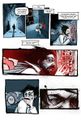
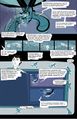
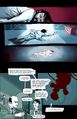
Part 2 opens with Doug Rattmann traversing the innards of the facility. The Companion Cube informs him that the anti-psychotic he took in Part 1 is starting to work, as the Cube slowly fades to silence. Doug finds Chell in her Cryo-Chamber in the Relaxation Center, where the Party Escort Bot has placed her. He decides to try to save her by getting to Cryo-Control, but the Sentry Turrets block his way. Finding a panel in the wall, he quickly realizes that GLaDOS' destruction blew the main power grid, and that all the Cryo-Chambers have gone off-line as a result, including Chell's. Doug then attempts to run past the Turrets but is struck down.
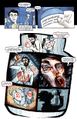
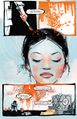
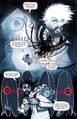
Time for another flashback, this time set after GLaDOS has flooded the Enrichment Center with her neurotoxin. Rattmann, apparently the only survivor, is taunted by GLaDOS about his schizophrenia as he escapes from the main testing facility. While GLaDOS continues to taunt and manipulate him, Rattmann manages to reach the file room where he finds Chell's file, declaring that she's "the one", then puts her on top of the Test Subject list.

Back to the present, Rattmann is lying on the floor, wounded by the Turrets, reaches out to his Companion Cube but loses consciousness.
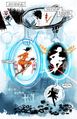
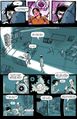
Another flashback begins, involving Henry having a conversation with GLaDOS. During the conversation, she tells him she has lost all interest in killing since she was fitted with a Morality Core and that she would like to perform a recreation of the Schrödinger's cat experiment during "Bring Your Cat to Work Day". She says that, added to the boxes and the cats, she needs a little neurotoxin. Henry, unaware of her malicious intentions, accepts, "as long as it's for science", thus sealing the employees' fate.
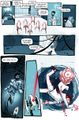
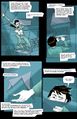
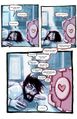
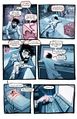
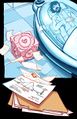
Doug regains consciousness, and his schizophrenia has returned. The Cube can talk again and asks about Chell being "the one" and how Doug knew she is, to which he admits it was just a hunch. The Cube then tells Doug to patch Chell's Cryo-Unit in the reserve grid to restart her life support, which works but keeps Chell in an everlasting sleep until she is woken up, "both alive and dead, until someone opens the box".
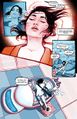
Exhausted, Rattmann crawls into the bed of a Relaxation Vault, and presumably falls asleep. On the floor, Chell's files scatter on the ground, showing that she should not be tested, as she is abnormally stubborn and never ever gives up.
Trivia[edit]

- The binary code shown in panel 8 can be translated as "The cake is a lie".
- In panel 8, a book titled "Art Therapy - The Bennett Way" can be seen. It may be a reference to Walter Bennett.
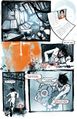
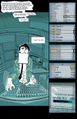
- Panel 13 features the first visual appearance of the Party Escort Bot.
- Panel 13 also features several references to the Half-Life and Half-Life 2 story arcs: an HEV and Health Chargers from Black Mesa can be seen on a wall, a Gravity Gun can seen on the table where Doug is working on an ASHPD, and a Combine Health Charger can be found on top of a shelf.
- In panel 25, the "both alive and dead until someone opens the box" is a reference to Schrödinger's cat. This in itself is also a reference to Chell's cryogenic state while inside the Cryo-Chamber.
- While "Lab Rat" is originally a reference to animal testing, it is also a Portal achievement, requiring to acquire the fully powered ASHPD.
- Lab Rat is included in the book The Sacrifice and Other Steam-Powered Stories, published by Dark Horse on November 16, 2011. The book collects all the comics made by Valve as of November 2011.[3]
Gallery[edit]
Part 1[edit]
Panel 1.
Panel 2.
Panel 3.
Panel 4.
Panel 5.
Panel 6.

Panel 7.
Panel 8.
Panel 9.
Panel 10.
Panel 11.
Panel 12.
Panel 13.
Panel 14.


Part 2[edit]
Panel 15.
Panel 16.
Panel 17.
Panel 18.
Panel 19.
Panel 20.
Panel 21.
Panel 22.
Panel 23.
Panel 24.
Panel 25.
Panel 26.


Misc.[edit]
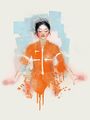
Cover sans text.
Cover concept.
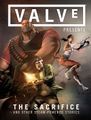
Cover of Dark Horse's The Sacrifice and Other Steam-Powered Stories, including Portal 2: Lab Rat.


References[edit]
- ↑ 2.0 2.1 2.2 2.3 Portal 2: Lab Rat - Part 1 on IGN
- ↑ Valve Presents: The Sacrifice and Other Steam-Powered Stories at Dark Horse Comics
External links[edit]
- Official website (features the full comic [with and without speech balloons] and wallpapers based on it)
- Expanding the World of Portal 2 (chat with project leader Mike Oeming) on IGN