Central AI Chamber
| Warning! This article has yet to be cleaned up to a higher standard of quality, per our Cleanup Project. It may contain factual errors and nonsense, as well as spelling, grammar and structure issues, or simply structure problems. Reader's discretion is advised until fixing is done. | ||
|---|---|---|
You can help clean up this page by correcting spelling and grammar, removing factual errors and rewriting sections to ensure they are clear and concise, and moving some elements when appropriate. |
| This article would greatly benefit from the addition of one or more new images. | ||
|---|---|---|
Please upload one or several relevant images (from canonical / official sources) and place it here. Once finished, this notice may be removed. |

| |

| |

| |
| Central AI Chamber | |
|---|---|
| General information | |
| Location | |
| Builder |
|
| Usage | |
| Era(s) |
|
| Faction | |
| Game information | |
| Map(s) |
|
The Central AI Chamber,[1] a setting for many major events in Portal and Portal 2, is a large bay that houses a body for the Central Core to manage most of the Aperture Science Enrichment Center.
Throughout the series, GLaDOS controls many aspects of the Enrichment Center through her status as the Central AI. In the climax of Portal 2, Wheatley took over and due to his ignorance, he nearly caused the facility to explode.
Contents
Overview[edit]
Portal[edit]
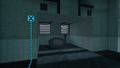
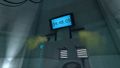
The room was a large octagonal chamber in the center of the Enrichment Center, in which GLaDOS was stored while suspended from the ceiling. In the small lobby area, the Aperture Science Red Phone is located next to several computers. Under a concealed door, a Rocket Turret was kept, seemingly for security, and numerous monitor screens line the walls and encircle GLaDOS.

Near the climax of Portal, Chell escapes GLaDOS' testing tracks and makes her way to the core room. Upon finally reaching the chamber, GLaDOS continues lying about having tried to kill her, and pretends to have accidentally dropped the Morality Core onto the ground. Chell promptly disposes of this core into a nearby incinerator, causing GLaDOS to reveal that doing so frees her from the restrictions implanted on her to prevent usage of neurotoxin in the facility. Chell eventually defeats her by disposing all of her cores and killing her.
Portal 2[edit]
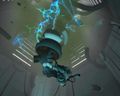
The chamber has been heavily damaged due to the climax of Portal, and is almost entirely in ruins. GLaDOS' remains are scattered around the room. After Wheatley accidentally reactivates her through the Main Breaker Room, GLaDOS disposes of him by crushing and tossing him aside, possibly to avoid the Aperture Science Announcement System from detecting the presence of a substitute core.

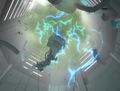
When Chell returns by Wheatley's assistance to the room at the midpoint of the game, the room has been completely reconstructed in a form bearing little resemblance to the original chamber created by Aperture staff. Despite this, it appears protocol has forced GLaDOS to retain specific elements of the chamber as part of design, including a Core Transfer Hatch and a Stalemate Resolution Annex. Via Core Transfer, GLaDOS' core is removed from her body and replaced with Wheatley's, giving him control of the facility. The power almost immediately takes over Wheatley, prompting him to transfer GLaDOS' core into a potato battery and plunge both her and Chell into the depths of the facility.
The chamber is witnessed again at the end of the game upon Chell and GLaDOS' return to the upper structure and completion of several tests composed by Wheatley. Since the last visit, Chell has inadvertently sent pumps of Mobility Gels up into the new facility, which she witnesses are being pumped under the room, along with bombs. It also appears Wheatley has decided to raise the room closer to the surface. Eventually, Wheatley is defeated by the duo and GLaDOS manages to have the previously hidden Core Transfer Hatch plug her back into her body.
When Chell awakes after losing consciousness, the room is shown to have been reverted back to its previous form and location by GLaDOS, having been sunken back down deeper into the facility. The length of Chell's elevator ride up to the surface shows just how far down the room has moved, although not to any exact unit.
Related Achievements[edit]
| Portal 2 | |
|---|---|

|
Stalemate Associate (15G) |
| Press the button! | |
Behind the scenes[edit]
- According to concept art of Portal 2, the player was originally meant to enter the chamber through the catwalks surrounding it.[2] However, they were completely removed at some point in development in favor of reusing the original entrance.
- There are several unused textures within the game files of Portal 2 that suggests there were originally going to be various signage that informs the player that they are approaching the Central A.I. chamber.
- There are actually two AI chambers. The first houses GLaDOS, whilst the second lay dormant in the bowels of the facility until the events of the Cooperative Testing Course - "Art Therapy". It contains the prototype chassis for GLaDOS.
Trivia[edit]
- Despite the fact that the white Core Transfer Hatch was never seen in the first Portal, it might be safe to assume that the hatch is a retcon, and therefore technically had always existed underneath GLaDOS. In Portal 2, the only reason the hatch was not seen was due to it being covered in rust and various debris.
- Although the Core Transfer Hatch is never directly seen in Wheatley's configuration of the room, it is proven to have been hidden by the panels beneath him. This is proven when GLaDOS and Chell were pulled by the Core Transfer maintenance arms after Wheatley was disposed of.
Gallery[edit]
Portal[edit]
Concept art[edit]
Concept art for the lobby.
Ditto, with the four pillars numbered.
Alternative Version.
Ditto.
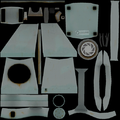
Concept art of computers, which can be seen in previous concept art.


Screenshots[edit]
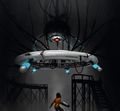
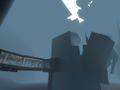
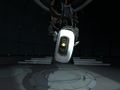
GLaDOS' chamber seen from the outside.

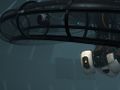
Numerous catwalks seen nearby GLaDOS' chamber.
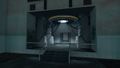
The lobby of GLaDOS' chamber.
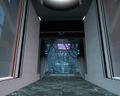
The Material Emancipation Grill in the room's entrance.
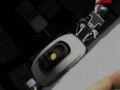
Aperture Science Red Phone in the lobby of GLaDOS' chamber.
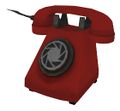
Aperture Science Red Phone model.
Texture of unused white skin of phone.
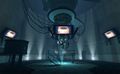
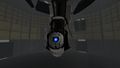
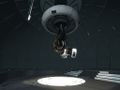
GLaDOS as seen in the Central AI Chamber.
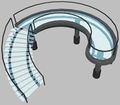
Model of the stairs located right under GLaDOS.
The bunker housing the incinerator button is found.
The Emergency Intelligence Incinerator.
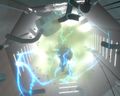
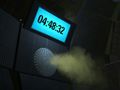
The neurotoxin flooding the chamber against the countdown.
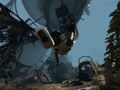
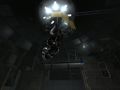
GLaDOS ascends while being destroyed.
Ditto.
Ditto.


Portal 2[edit]
Pre-release[edit]
Concept art[edit]
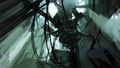
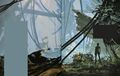
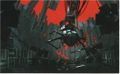
Wrecked Central AI generators.
Ditto, with Chell.
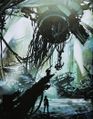
Chell standing before a lifeless GLaDOS.
Ditto.
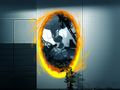
A booted up GLaDOS as seen through a portal.

After reboot.
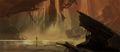
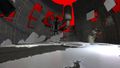
Ruins of the chamber.

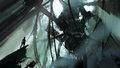
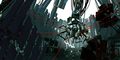
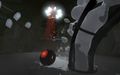
WheatDOS defending himself with flame-throwing turrets during an early version of the final showdown.
Ditto, without flames.

Ditto.
Ditto.

Ditto, without turret.
Ditto.

Ditto.
The first diagram created by Phil Co for the final battle with Wheatley.


Screenshots[edit]
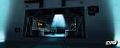
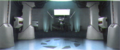
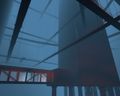
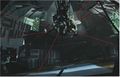
The Central AI Chamber in ruins.
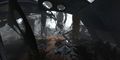
Ditto.
An early mockup of the stalemate button used to replace Glados with Wheatley..
Early prototype of Wheatley's version of the Central AI Chamber.
Ditto.


Retail[edit]
Screenshots[edit]
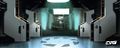
Exterior of GLaDOS' ruined chamber.
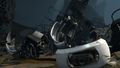
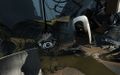
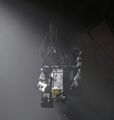
A lifeless GLaDOS in the ruins of the chamber.
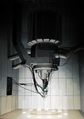
The main breaker room, hidden beneath the chamber.
Wheatley attached to the Core Input Receptacle and accidentally powering up GLaDOS.
GLaDOS after awakening in her ruined chamber.
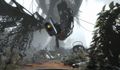
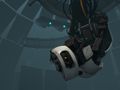
GLaDOS grabbing Chell and Wheatley with mobile pincers.
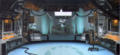
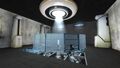
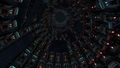
The reconstructed chamber as seen in the middle of the game.
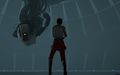
Chell facing GLaDOS in the latter's reconstructed chamber.
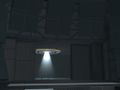
A tube is lowered as an attempt to poison Chell with neurotoxin.
Wheatley rolling into the neurotoxin ventilation tubes.
Stalemate Resolution Annex unveiling itself.
GLaDOS during her forced core transfer procedure.
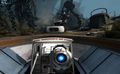
Wheatley in his configuration of the Central AI Chamber.
Wheatley deploying neurotoxin into his version of the chamber.
Wheatley throwing the Aperture Science Bombs.
GLaDOS dragged back to her body in Wheatley's configuration of the room.
GLaDOS during the ending monologue.
GLaDOS' original prototype chassis in an older Central AI Chamber, as seen in Peer Review.


Game files[edit]

The unused Central AI Chamber signage.

List of appearances[edit]
Main games[edit]
Other[edit]
- Portal 2: Lab Rat
- The Final Hours of Portal 2
- Portal Pinball (Non-canonical appearance)
- Lego Dimensions (Non-canonical appearance)
References[edit]

- ↑ "signage you are here01.vtf" to "signage_you_are_here05.vtf" in the Portal 2 game files
- ↑ Original Portal 2 chamber entrance concept
| Preceded by Incinerator Room |
Portal journey | Succeeded by Aperture Science Extended Relaxation Center (Portal 2) |
| Preceded by GLaDOS' testing track (Portal) |
Portal 2 journey (1) | Succeeded by Incinerator Room |
| Preceded by Neurotoxin Generator |
Portal 2 journey (2) | Succeeded by Test Shaft 09 |
| Preceded by Wheatley's testing track |
Portal 2 journey (3) | Succeeded by Moon |
| Preceded by Moon |
Portal 2 journey (4) | Succeeded by N/A (Outside) |
| Preceded by Section N Robotic Associate Construction Annex |
Portal 2 co-op journey | Succeeded by N/A |