Black Mesa Training Facility

| |

| |
| Black Mesa Training Facility | |
|---|---|
| General information | |
| Destroyed |
200-, during the Black Mesa Incident |
| Location | |
| Usage | |
| Era(s) | |
| Faction | |
| Map(s) |
|
| Designer(s) | |
- "Hello and welcome to the Black Mesa Hazard Course, where you'll be trained in the use of a Hazardous Environment Suit. I am your Holographic Assistant."
- ― Gina Cross' Holographic Assistant counterpart[src]
The Black Mesa Training Facility, also referred to as the Hazard Course, is a recurring location featured in Half-Life and its expansions. It is used for training the Black Mesa personnel. It also serves as an in-game training for the games that can be accessed from the main menu.
Contents
Overview[edit]

The Training Facility is located in Sector A section of the Black Mesa Research Facility.[4] According to the spring/summer season schedule, tests are overseen by the Training Office that handles all tests performed in the Hazard Courses, including those outside the Training Facility. They follow a seasonal schedule, with typically one test per day.[5]
The training is given to perfect maneuvers like jumping and crouching, using objects, and firing weapons. Trainees are to sign a contract before taking the Hazard Course, in which they agree to waive all rights as an employee of the Black Mesa Research Facility in case of serious injury, dismemberment, toxic poisoning, burns, rashes, or lesions.[6]
Trainees are taught by prerecorded Holographic Assistants in both the Hazardous Environment Suit Training and the Security Guard Training; in some areas, they are monitored by observing scientists standing in observation rooms with large windows, sometimes equipped with computers, corkboards and Health Chargers. These large windows are equipped with shutters that can be closed in case of emergency, and are linked together through security doors. They also connect to the rest of the facility through elevators and maintenance areas. Some areas are also protected by Automatic Turrets. Cockroaches and rats are also commonly found in the stations.
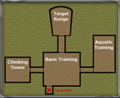
The course is divided into stations. Stations typically are further divided into small numbered "steps"; most of the time, when a step is passed, a sound is heard while the number of the step is lit on the wall at the end of the station. Once all numbers are lit, the test has been passed. Holographic Assistants usually first show the move to the trainee when needed. Audio instructions, as well as holographic animations, can be replayed at will by interacting with small terminals located at the start of each station. Congratulations and support messages are also heard when a test is passed or when the trainee fails a step, respectively.
Features[edit]
Lobby[edit]
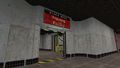
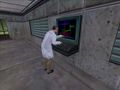
The Hazard Course is accessed from a central lobby connected to the Black Mesa Transit System, which only appears in the PlayStation 2 version of Half-Life’s training chapter, Hazard Course. Two scientists are monitoring the Holographic Assistant software using several computer consoles. One of them greets trainees, and handles the needed paperwork. The other seems to mostly handle the computers.[6]
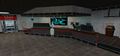
Overview of the lobby.
The entrance to the Training Facility from the Transit System.

Another view of the lobby.
Scientist reading Freeman's contract for the Hazard Course.
Ditto.
The door to the Hazard Course.


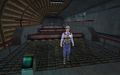
Introduction[edit]
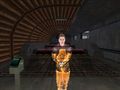
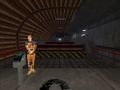
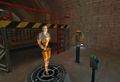
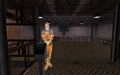
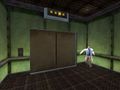
Upon reaching the start of the Hazard Course from the elevator coming from the left door in the lobby above, the trainee is welcomed by the Gina Cross-based Holographic Assistant or the Miller-based Holographic Assistant and presented the Hazardous Environment Suit or the armor vest and helmet.
The Gina Cross-based Holographic Assistant.
Ditto, in the PlayStation 2 version of Half-Life, with the HEV Suit right behind her.
Introducing the HEV Suit.
The Miller-based Holographic Assistant
Introducing the vest and helmet.


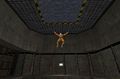
Jumping and ducking[edit]
Here the jump and duck moves are taught, while scientists monitor the tests from behind large windows. It consists of seven stations; the first four are built around a maintenance area equipped with an elevator. The observation rooms are all connected through security doors; the first one connects to the central maintenance area through a security door and is equipped with a larger elevator.
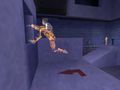
In the first area, the trainee is required to jump over three pipes; in the second - duck under another three pipes; in the third - jump over a pipe, duck under the second, and jump again over the last one; in the fourth - jump to reach each of the three elevated pipes, and duck to get inside them. The fifth test can be reached by utilizing the learned move and entering a pipe starting above the ground; the station consists of a metallic shaft where the trainee is taught how to climb a ladder. The sixth area consists of a large room where more complicated jumps are to be achieved. Two platforms must be crossed in three longer jumps, and the trainee can restart at will if they fall. After a short metallic corridor, the Assistant introduces the Long Jump Module in the seventh and last area, requiring to make a long jump over a long gap; this portion of the course is not available to security guards.
The first jump test in Half-Life.
The first jump test in Blue Shift.
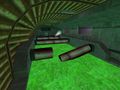
The second area flooded with radioactive waste in Decay.
The Assistant introducing the longer jumps in Half-Life.
Rosenberg explaining to the duo how it is important to assure the safety of the people still in the facility in Decay.
The maintenance area around which are organized the first four stations of the "Jumping and ducking" section in Decay.
Rosenberg opening the shutters of the first area's observation room in Decay.
The working Assistant at the first area in Decay.


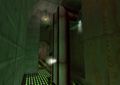
Gina Cross facing her holographic counterpart.
Zombie in the damaged observation room of the third area in Decay.
The working Assistant at the third area in Decay.
The fourth area with one of the pipes that has fallen in Decay.
Confused Vortigaunt putting his claws through the Assistant in Opposing Force.
Vortigaunt sending an electric charge at the Assistant in Opposing Force.
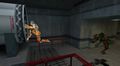
The Vortigaunt chasing the Assistant in Opposing Force.
Rosenberg watching Barney's test from the observation room of the fourth "Jumping and ducking" area.
Zombie in the fourth area's observation room in Decay.
The same room in Opposing Force.
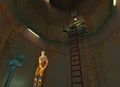
The Assistant explaining how to climb a ladder in Half-Life.
The sixth "Jumping and ducking" test in Blue Shift.
The Assistant introducing the Long Jump Module in Half-Life.
Ditto, in the PlayStation 2 version of Half-Life.

The Assistant demonstrating a long jump in Half-Life.


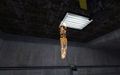
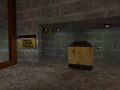
Objects and mechanisms[edit]
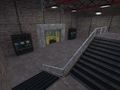
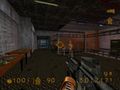
After a catwalk and a ladder, the Assistant teaches the trainee how to use an elevator, which will take them up to an elevated platform. The subject is then required to jump down. On the floor is a target partially covered with blood stains. Farther on the wall of the room are more blood stains left by two hands, cynically suggesting not every trainee has managed their jump well. After a short corridor, the Health Charger is introduced, as "medkit". After another corridor, a test requires spinning a bridge to pass over a large room in which two large tanks are stored.
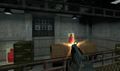
The two next stations require dealing with crates. The first one must be pushed into a small pit. The next area is a small hangar with metallic crates, where a crate must be pulled instead of pushed to clear the way. At the end of the room, the trainee must push three crates and walk over them to reach the exit. In the next room, the crowbar is introduced by the Assistant. There the trainee must smash through larger crates to proceed, then enter a vent by smashing the grate at its start.
In the next area, the Assistant introduces the HEV Suit's flashlight. There, a maze-like platform must be followed to the end of a large room, where the lights have been purposely turned off by a security guard stationed in a nearby room. Many HEV Suit batteries can be picked up there.
Security guards are introduced to the HEV Suit Charger and the Health Charger at the same time.
The elevator station.
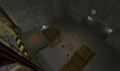
The target and blood stains after the elevator.
Introducing the crowbar.
Introducing the Health Charger.
The spinning bridge station.

Introducing the use of crates.
The flashlight maze.


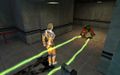
Target Range[edit]
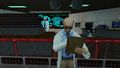
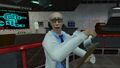
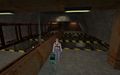
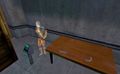
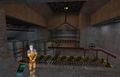
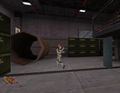
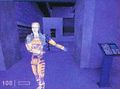
After passing over a large canal, the use of weapons in the Target Range is introduced, in a room where an MP5, grenades and magazines have been placed on several tables. The next room is a mock firing area, which contains seven cardboard humanoid targets, which move on a fixed path.
In the Target Range.
The Assistant in Decay.
The Target Range in the PlayStation 2 version of Half-Life.
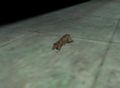
One of the several rats found in the Target Range.
Gina chasing Xen creatures on the lower level of the Target Range.
The new lock-on training added in the PlayStation 2 version of Half-Life.


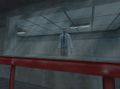
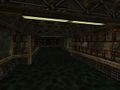
Aquatic Training[edit]
The following area involves diving into a large water pool and swimming through it while stopping at the midpoint to replenish air.
The Assistant at the very start of the Aquatic Training area.
The Assistant showing how to swim to the surface.


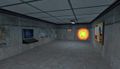
Health hazards[edit]
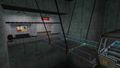
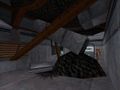
Here, the HEV Suit Charger is introduced. In the next area, the trainee is required to go under the floor, where pipes are leaking steam, and a small furnace explodes, both causing damage to the player. The following area is a small shaft similar to the one where climbing ladders was introduced, only that its bottom is filled with radioactive waste, causing damage to the suit's power. After that part is a large elevator.
Introducing the HEV Charger.
At the start of the "Health hazards" station.
Steam inside the "Health hazards" station, with radioactive waste below the floor.
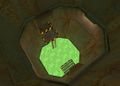
The shaft with radioactive waste.


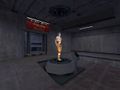
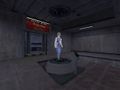
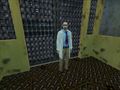
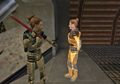
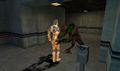
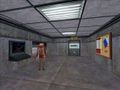
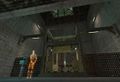
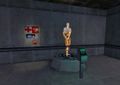
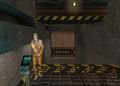
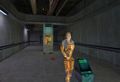
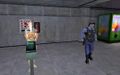
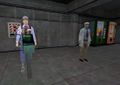
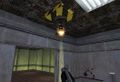
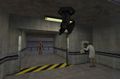
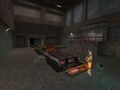
Use of human assets[edit]
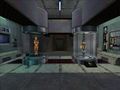
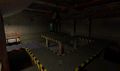
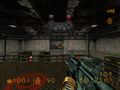
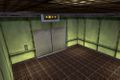
Upon leaving the elevator is a civilian area where two security guards and a scientist can be found. They are watched by two Ceiling Turrets that will fire if one of them is hurt (they will shoot at everyone except the scientist). There the soda vending machine giving 1 health point per can is also introduced, though not verbally. The trainee is taught how to get the help of security guards and scientists to achieve their goals, or ask them to stay put. If he tries opening the security doors by himself, several messages, played by the Black Mesa Announcement System, can be heard (see below).
The elevator leading to the "Use of human assets" area in Half-Life.
Ditto, with Rosenberg scared by the active Automatic Turrets in Decay.
The Assistant explaining how to get help from the security guards in Half-Life.
Ditto, in Blue Shift.
Security guard opening the way to the Transit System, with an idle Automatic Turret in the ceiling.
Scientist opening the way to the Transit System in Blue Shift.
The Assistant malfunctioning in Decay.
Automatic Turret firing at Freeman in Half-Life.


Rosenberg clearing the way to the Transit System in Decay.

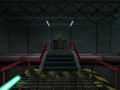
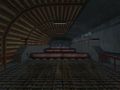
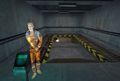
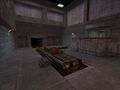
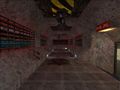
Transit System station[edit]
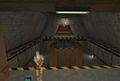
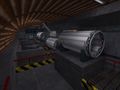
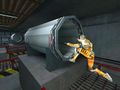
The next area is a large hall with a freight train similar to that of the Materials Transport is waiting on its tracks. There, the final test is taught - how to use a freight train. When the trainee drives the train into a dark tunnel, the Hazard Course concludes itself.
The Assistant explaining how to use a freight train.
PlayStation 2 version.
Same location in Decay.


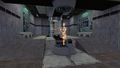
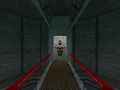
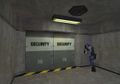
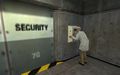
Maintenance area[edit]
This area, located under the standard Hazard Course, is accessed with a ladder from the observation room of the fourth "Jumping and ducking" station. There a dimly-lit L-shaped "Secure Access Corridor" heavily protected by Automatic Turrets is accessed from security door D-AL 201. When they trigger, the message "Security breach detected" by the Black Mesa Announcement System is heard; the turrets can be disabled in a small station, reached via security door DL-A 203. At the end of the corridor with the powerbox are locked doors, which lead to the ground floor of the Target Range.
Automatic Turrets in the maintenance area under the Hazard Course.
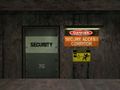
Warning sign.
Two of the four large fans.
The manual elevator controls.


Appearances[edit]
Half-Life[edit]
In Half-Life, Gordon Freeman is sent here for the Hazardous Environment Suit training. Gordon also visits the course on May 16 at 07:30, the day of the Black Mesa Incident, before the experiment. As heard during the tram ride, the Hazard Course decathlon was to commence on May 16 at 19:00 in the Level 3 facility. This never happened due to the incident.
There are some minor changes in the Dreamcast version. These changes were carried over to the Blue Shift version of the course. The cheat code for the slow motion mode is given when the course is completed.
The course was updated for the PlayStation 2 version. The player starts in a lobby connected to the Black Mesa Transit System. He is greeted by two scientists before he enters the course. The Target Range was also expanded to allow the introduction of the new lock-on feature, an automatic targeting system for the suit. It is impossible to die during the course.
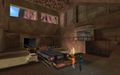
Opposing Force[edit]
In Opposing Force, Adrian Shephard can teleport himself to a damaged version of the course by using the Displacer Cannon in the chapter We Are Not Alone. Here, a Vortigaunt is seen attacking the Hologram Assistant, mistaking it for an actual human.
Blue Shift[edit]
In Blue Shift, Barney Calhoun is scheduled for a two-day training course that will prepare him for his new assignment. The course is nearly identical to its Half-Life counterpart with minor adjustments to account for the differences in gameplay mechanics due to not utilizing the HEV Suit. He attends the course on May 12 at 08:00.[5] It is only available on the PC version.
Decay[edit]
In Decay, the protagonists Gina Cross and Colette Green have to escort Rosenberg through the course to the surface and call for help after the incident in the mission Hazardous Course. These areas include maintenance tunnels, as well as some familiar areas from the original course. The entrance to the course can be seen in the next mission, Surface Call. It is located near the Satellite Communications Center.
Behind the scenes[edit]
The Training Facility, internally named the training room,[7] was designed and built by Karl Deckard.[1] The spinning bridge was built by Dave Riller, who used the "door hack" flag for the momentary_rot_button entity created by Jay Stelly specifically for this part of the course.[2] The Opposing Force version was created by Rob Heironimus;[3] it was Joe Kennebec's idea for the player to revisit the destroyed version of the facility.[8]
The Training Facility is the only place in the game in which rats appear. As an Easter egg in Half-Life, repeatedly attempting to enter the locked security doors at the end of the course triggers a unique set of Black Mesa Announcement System lines. The constant yet fruitless attempts will eventually perturb the computerized voice, leading to some humorous responses directed at the player. Moreover, in the course's Opposing Force rendition, a photo of Rob with Easter eggs in his eye sockets can be found in the observation room. It was taken by his co-worker John Faulkenbury in Easter 1998.[9]
Blue Shift's Training Facility for was created exclusively for the PC release of the game, not being present in the original Dreamcast version.[10][11]
The "Hazard" map present in the Half-Life 2 leak's WC map pack appears to be inspired by the Hazard Course.
Gallery[edit]
Unused map.

Unused sign.

Ditto.
Ditto.
Early version.
Ditto.
Ditto.


List of appearances[edit]
Main games[edit]
Other[edit]
- Half-Life: Day One (First appearance) (Non-canonical appearance)
- Half-Life: Uplink (Non-canonical appearance)
- Half-Life 2: Raising the Bar
See also[edit]
References[edit]
- ↑ 1.0 1.1
 Karl Deckard on LinkedIn
- ↑ 3.0 3.1 Randy Pitchford's .plan update on Blue's News (March 23, 2000)
- ↑ Black Mesa Transit System map
- ↑ 5.0 5.1 Half-Life PlayStation 2 instruction manual
- ↑ 6.0 6.1 Half-Life PlayStation 2
- ↑ Half-Life game files
- ↑ Joe Kennebec on his video game work (August 16, 2016)
- ↑ John Faulkenbury's comment on The Easter Egg Archive
- ↑ Half-Life: Blue Shift Interview on Stomped (April 6, 2001) (archived)
- ↑ Half-Life: Blue Shift Interview on GameSpyDaily (May 9, 2001) (archived)