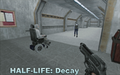
Cut missions from Half-Life: Decay
| The contents of this article have been cut. | ||
|---|---|---|
The subject matter of this article contains in-development information that was cut from the final version of an official and/or canonical source and appears in no other canonical source. It may also contain incomplete information since not all cut material is publicly known. |
This article describes what is known about the cut missions from Half-Life: Decay. Originally, Decay was going to feature twelve campaign missions.[1] However, the game shipped with only nine, leaving three to have been cut from the final product.
Contents
Mission 6: Central Transit Hub[edit]
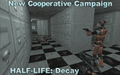
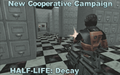
Originally set to be the sixth mission, Central Transit Hub (map name ht06hub) directly follows up on the events of the previous mission, Domestic Violence. Much of the mission's plot can be reconstructed from the leftover dialog.
The level begins with the security guard rescued from the dormitories leading Gina, Colette, and Dr. Keller to the Central Security Station where they can monitor transmissions, check on the transit lines, open and close the security gates in the adjacent Central Transit Hub, and track HEV suit movement. After using his clearance codes to enter the security station, a radio message comes in from a scientist at the Lambda Labs. He says they're trying to close the dimensional breach, but something from the other side is holding it open. They need to launch the Omega Satellite in order to get clean readings on the rift, but the military has aborted the launch. They hope Gordon Freeman can restart the launch, but they must first upload the All-Clear signal to the Black Mesa air traffic systems. The code is kept in the high security file room near the security station, while the air traffic systems are located directly over the Central Transit Hub.
The guard opens the security gates from the station to the file room on the other side of the hub, sending Gina and Colette to retrieve the code. As they progress further into the hub, the guard closes each gate behind them after both have passed one, forcing them to move together. During the course of the mission, the guard mentions that they need to perform some repairs in order to listen in on the military's radio transmissions, but something is blocking the maintenance door, so they have to take a detour through the loading dock and storage bay. They soon discover that it's a Gargantua blocking the door. Gina and Colette must work together to lure the creature onto a bridge while one operates the bridge controls to destroy it. The two eventually reach the file room, battling aliens and soldiers along the way, and retrieve the code.
In the final game, Central Transit Hub was written out of the story by altering Dr. Keller's lines in the previous mission. Instead of looking for a guard who knows the clearance codes to the Central Security Station, Dr. Keller's dialog suggests that the rescued guard actually knows the All-Clear signal necessary to allow the satellite's launch, thus bypassing the need to acquire the code in the Central Transit Hub's file room.
In the game files, the security guard model possesses two unused animations intended for use in Central Transit Hub: sat_keypad, in which the guard enters a code into a panel, and sat_point, in which the guard identifies the locations of Gina's, Collete's, and Gordon's HEV suits on a screen. The Gargantua has an unused squish animation in which it braces for impact as the bridge mechanism starts to close in and crush it. A slightly broken model for a pizza box mentioned by the guard is also present.
Behind the scenes[edit]
According to Gearbox designer Matthew Armstrong, the idea for Central Transit Hub mostly came from a desire to visit the location which had been previously mentioned but had otherwise gone unseen. It was the least complete mission when it was cut and also the least important from a story perspective.[2] Of what was built, they had made the hallways wide to accommodate the co-operative combat. The hallways were going to get a texture pass and possibly made narrower.[2] The node data for the map can be extracted from the files.
A bridge mechanism with a similar design can be found in Blue Shift in the chapter Insecurity (map ba_maint). The map appears to be created by Matthew Armstrong; his nickname "HellFace" can be found in entities. It is unknown if they recycled the same brush work for the cut mission.
Gallery[edit]
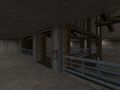
The security guard leads the group to the Central Security Station.
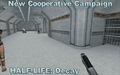
Ditto.
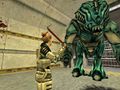
The Gargantua.
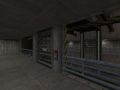
The high security file room.
Ditto.
Ditto.
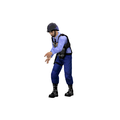
Keypad animation.
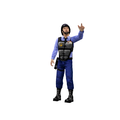
Pointing at a screen.
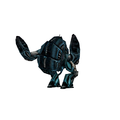
Gargantua dying animation.
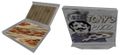
The pizza.
The bridge mechanism in Blue Shift.
Ditto.


Mission 8: Hangar[edit]
Originally set to be the eighth mission, the events in Hangar (map name ht08hangar) were to have been set up in the previous mission, Code Green. In lines that were cut from the final game, Gina and Colette would overhear a soldier remarking that tracking systems were in place and that they were successfully following Gordon's movement. However, the military still did not know who the other two individuals in HEV suits were. After successfully uploading the All-Clear signal, the two would have entered the hangars at the air field to begin the next mission.
Shortly after entering Hangar, they find a scientist being interrogated by soldiers looking for Gina's and Colette's suit ID numbers so they can track those two as well, though he only knows the ID number of Gordon's suit. They rescue the scientist, and he informs them that they need to destroy the military's tracking devices before they can capture Gordon. They move on and find a wounded scientist hiding in a ceiling hatch. He tells them to take the weaponry in the room to destroy the Osprey outside in order to cut off the military's reinforcements. After Hangar was cut, this encounter with the Osprey was ultimately moved to the previous mission.
In the game files, the scientist model possesses two unused animations intended for use in Hangar: interogation1 and interogation2 [sic] in which the first encountered scientist cowers as he's being interrogated by soldiers.
Gallery[edit]
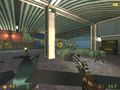
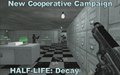
A dismantled Osprey sits inside a hangar at the air field.
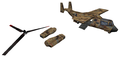
Unused Osprey
hangar_idleanimation.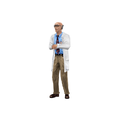
Unused scientist
interogation1animation.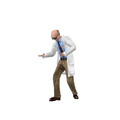
Unused
clutch_stomachanimation.


Mission 9[edit]
Very little information is available about what was originally intended to be the ninth mission as no media demonstrating it has ever been released and few remnants of the level remain in the game files. It would have directly followed the events of Hangar. In an interview, Gearbox designer and writer Randy Pitchford described a mission in which Gina and Colette would manage to save Gordon from being killed after he is captured by the military.
- “There's also an instance in the original game where you're knocked unconscious by soldiers, who then begin dragging you somewhere, muttering about how they're going to kill you. You wake up later in a trash compactor wondering what happened. In Decay, you find out that these two scientists are the ones who save you--because you, yourself, have to save Gordon from the soldiers in Decay.”
- — E3 2001 Preview[1]
Unused dialog in Decay portrays two soldiers, both voiced by Brice Armstrong, celebrating the capture of Gordon and describing how they intend to shoot him before dropping his body into the trash compactor, a location seen from Gordon's perspective in Half-Life. Several animations exist depicting Gordon's attempted execution. The human grunt model includes cap_gordon_idle and cap_gordon animations showing a soldier preparing to and successfully killing an unconscious Gordon if the players fail to intervene in time. Gordon's model includes the accompanying capped_idle and capped_fall animations showing him being propped up by the soldier and subsequently falling down into the trash compactor. The trash compactor map was updated in the port seemingly to reflect the changes for the mission.
Gallery[edit]
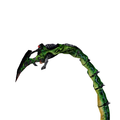
Unused Tentacle
tentacle_smashanimation.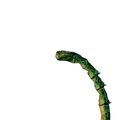
After being decapitated.
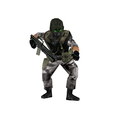
Unused soldier
cap_gordon_idleanimation.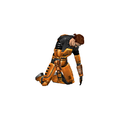
Unused Gordon
capped_idleanimation.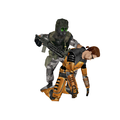
Reconstruction of the scene.


References[edit]
- ↑ 1.0 1.1 E3 2001 Hands-on: Half-Life on GameSpot (May 17, 2001) (archived)
- ↑ 2.0 2.1 The cut missions of Half-Life: Decay on ValveTime (October 27, 2016)
External links[edit]
 Half-Life / Half-Life: Decay Trailer for PlayStation 2 on YouTube - Featuring footage of the cut Central Transit Hub mission